I used to think that having a nice apartment meant having a massive credit limit and a designer furniture catalog on speed dial. Growing up in a cramped rental with my siblings, I learned pretty quickly that if something broke or looked outdated, you didn’t just go out and buy a replacement—you figured out how to make it work. Most people look at a scratched-up side table or a dated bookshelf and see junk, but I see potential. Instead of contributing to the endless cycle of cheap, disposable furniture that ends up in a landfill after six months, I’ve found that exploring upcycling furniture ideas is the smartest way to build a home that actually feels like yours without draining your bank account.
In this post, I’m stripping away the intimidation factor and giving you five practical, low-stress projects to get you started. I’m not talking about expensive professional-grade workshops or complicated carpentry; I’m talking about real-world fixes you can tackle with a few basic tools and a bit of patience. By the end of this list, you’ll have a clear roadmap for transforming five common household items into pieces that look intentional, feel high-end, and—most importantly—actually fit your life.
Table of Contents
Swap the Hardware
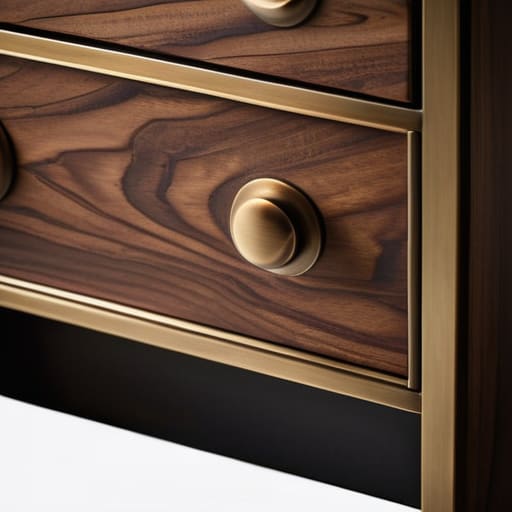
Most of the time, a piece of furniture looks “cheap” or dated not because of the wood, but because of the hardware. I’ve lost count of how many thrift store nightstands I’ve pulled apart just to swap out those generic, plastic-feeling knobs for something with a bit more weight. It’s probably the lowest effort way to make a massive visual impact without spending a fortune on new materials.
The Sand and Stain Method
If you find a solid wood piece that’s covered in a thick, ugly layer of dark cherry veneer, don’t walk away. That’s usually a sign of high-quality construction underneath. My go-to move is to strip it back down to the raw grain. It’s a bit of a workout, and you’ll definitely want to wear a mask, but seeing that natural wood texture emerge is incredibly satisfying.
Give It a New Life With Paint
Sometimes, the wood itself is just too far gone or has a grain pattern that doesn’t fit your vibe. In those cases, paint is your best friend. I’m not talking about a thick, gloopy coat of wall paint that cracks in a month, though. You want to use a high-quality chalk paint or a primer-heavy enamel that actually bonds to the surface so you aren’t sanding for three days straight.
Add Some Texture with Cane Webbing
This is one of my favorite tricks for when a piece feels a little too “solid” or heavy in a room. If you have an old cabinet or a side table with recessed panels, you can actually cut those panels out and replace them with cane webbing. It’s a huge trend right now, but for a good reason: it adds a light, airy texture that softens the whole look of the furniture.
Re-upholster the Basics
Don’t let a worn-out chair end up in a landfill just because the fabric looks tired. Most dining chairs or small ottomans are incredibly easy to refresh if you have a steady hand. I usually start by stripping the old fabric and checking the padding underneath. If the foam is crumbling, that’s your chance to add a fresh layer of high-density foam so it actually feels comfortable again.
The Bottom Line
You don’t need a professional workshop or expensive tools to see results; a little sandpaper and some patience go a lot further than a massive budget.
Don’t get paralyzed by the fear of making a mistake—it’s much easier (and cheaper) to sand off a bad coat of paint than it is to replace a broken piece of furniture.
Upcycling isn’t about chasing a specific “aesthetic” you saw on social media; it’s about making your space functional and making things last longer.
The Real Value of a Second Chance
“Upcycling isn’t about chasing some perfect, curated Pinterest aesthetic; it’s about looking at a piece of furniture that someone else gave up on and seeing the potential you can actually afford to bring to life.”
Owen Silas Vance
The Bottom Line
At the end of the day, upcycling isn’t about achieving some flawless, Pinterest-perfect showroom look. It’s about taking what you already have—whether that’s a scratched-up nightstand, a dull wooden chair, or a dresser that’s seen better decades—and making it functional for your life again. We’ve covered everything from the basics of a quick sand-and-paint job to more involved hardware swaps and stain refreshes. The goal here is to realize that most “junk” is really just a few small adjustments away from being a centerpiece in your apartment. You don’t need a workshop full of expensive power tools to make a difference; you just need a little bit of grit and the right mindset.
I know it can feel intimidating to pick up a piece of sandpaper for the first time, especially if you’re worried about messing up. But honestly? The biggest mistake you can make is letting a perfectly good piece of furniture end up in a landfill because you were afraid to try. Real competence comes from the willingness to fail a few times and keep going. Stop waiting for the perfect budget or the perfect toolkit to descend from the sky. Grab your multi-tool, find a project that catches your eye, and just start doing it. You’ll be surprised at how much confidence you build with every single finished piece.
Frequently Asked Questions
I don't have a garage or a workshop; can I actually do these projects in a small apartment without making a massive mess?
Look, I grew up in a cramped rental, so I get it. You don’t need a garage to make this work. The secret is containment. Use heavy-duty drop cloths—not just thin plastic—to catch everything, and work near a window for airflow. If you’re painting, stick to low-VOC options to keep the smell from taking over your bedroom. It’s all about prepping your “zone” before you start so cleanup doesn’t become a nightmare.
How do I know if a piece of furniture is actually worth the time and money to fix, or if I'm just throwing good money after bad?
Look at the bones. If it’s solid wood—not particle board or MDF—it’s usually worth the sweat. Check the joints; if they’re wobbly but the wood isn’t rotted, you can fix that. I always ask myself: “Can I fix this with tools I already own?” If the repair requires a specialist or a massive haul of expensive hardware, walk away. Don’t let a “project” become a money pit that just eats your weekend.
What are the absolute bare-minimum tools I need to get started so I'm not spending a fortune on equipment I'll only use once?
Look, I get it. You don’t need a garage full of power tools to start. I learned early on that buying everything at once is just a fast way to drain your savings. For most projects, just grab a multi-tool, a decent sanding block, a screwdriver set, and a small container of wood glue. If you’re painting, a basic brush and a drop cloth will do. Start small; you can always upgrade once you’re actually hooked.