I was standing in my first tiny rental kitchen, staring at a stained, beige wall of drywall, clutching a bag of subway tiles I’d bought on clearance. My gut told me I was about to make a massive, expensive mistake, and honestly, the internet wasn’t helping; most tutorials made it look like you needed a master’s degree in masonry just to avoid a crooked line. But here’s the thing: learning how to tile a backsplash isn’t about having a pristine workshop or a professional crew; it’s just about having the right patience and a decent set of spacers.
I’m not going to feed you any “Pinterest-perfect” fluff that ignores the reality of working in a cramped space with a tight budget. Instead, I’m going to walk you through the actual process—from prepping that messy wall to grouting without making a huge, sandy disaster. We’re going to focus on the practical steps that ensure your tiles actually stay straight and your kitchen looks intentional, not accidental. Let’s stop staring at that empty wall and just get it done.
Table of Contents
- Step-by-Step Instructions
- Smart Backsplash Layout Planning and Essential Tiling Tools Checklist
- Mastering Kitchen Backsplash Materials and How to Cut Tiles for Backsplash
- Five Ways to Keep Your Backsplash from Turning Into a Disaster
- The Bottom Line
- ## The Reality of the Grind
- The Finish Line
- Frequently Asked Questions
Guide Overview
Tools & Supplies
- Tile cutter or wet saw for precise cuts
- Notched trowel for applying adhesive
- Rubber grout float for spreading grout
- Spacers to maintain even gaps
- Level to ensure straight lines
- Backsplash tiles (calculate area + 10% extra)
- Tile adhesive or mastic (1 gallon/tub)
- Grout (1 bag based on joint width)
- Tile sealer (1 bottle for finishing)
Step-by-Step Instructions
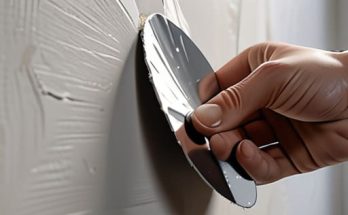
- 1. Before you even touch a tile, you need to prep the area. Clear everything off your counters and give the walls a good scrub with a degreaser. If there’s any leftover grease or dust, your thin-set won’t stick, and you’ll be staring at a falling backsplash in six months. Once it’s clean, grab a level and mark a straight line where you want your first row to sit. Most people forget that counters aren’t always perfectly level, so don’t trust the countertop to be your guide.
- 2. Now, let’s talk about the layout. Lay your tiles out on the counter first to see how they fit against your outlets and corners. You don’t want to end up with a tiny, awkward 1/2-inch sliver of tile at the end of a row—that looks amateur. If you see a bad gap coming, shift your starting point so the cuts on both ends look more balanced and intentional.
- 3. It’s time to mix your thin-set. Grab a bucket and a mixing paddle (or a sturdy stick if you’re really keeping it low-key) and mix it until it reaches the consistency of peanut butter. You want it thick enough to hold the weight of the tile but smooth enough to spread easily. If it’s too runny, your tiles will slide right down the wall, and if it’s too thick, you’ll be fighting it the whole time.
- 4. Start applying the thin-set using a notched trowel. Drag the trowel across the wall in a consistent direction—usually slightly upward—to create these little ridges. This helps air escape so you don’t get hollow spots behind your tiles. Apply it in small sections so it doesn’t dry out before you can get the tile pressed into it.
- 5. Press your first tile into the thin-set and give it a little wiggle to settle it in. This “wiggle” ensures the adhesive is making full contact. Immediately slide your spacers into the gaps between the tiles. I always recommend using plastic spacers rather than trying to eye it; they keep your grout lines perfectly straight and prevent that “leaning tower” look that drives me crazy.
- 6. Once you’ve finished a row, take a moment to check your work with a level. If something looks wonky, don’t panic—you can usually pop it off and reset it while the mortar is still wet. Once the whole wall is covered, let it sit for at least 24 hours. You’ll be tempted to grout immediately, but patience is a skill you need to master here; if the mortar is still soft, the tiles will shift when you start grouting.
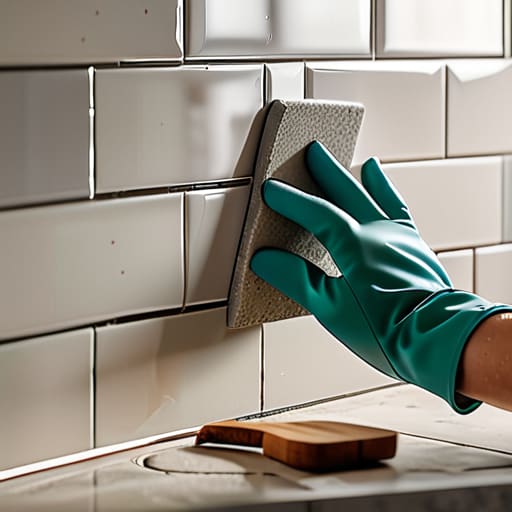
- 7. Finally, it’s time for the grout. Mix a small batch and use a rubber grout float to push it into the gaps at a 45-degree angle. You want to pack it in tight so there are no air pockets. After about 15–20 minutes, take a damp (not soaking wet!) sponge and wipe away the excess. It’s a bit messy, but seeing those clean, professional lines makes all the elbow grease worth it.
Smart Backsplash Layout Planning and Essential Tiling Tools Checklist
Before you even touch a bag of thin-set, you need to nail your backsplash layout planning. I’ve seen too many people start tiling from one corner only to end up with a tiny, awkward sliver of tile on the other side. It looks amateur and, frankly, it’s frustrating. Instead, find the center point of your wall and work outward. This ensures your cuts are symmetrical and balanced. Also, take a second to decide on your kitchen backsplash materials—if you’re using something heavy like natural stone versus a lightweight ceramic, your prep work and adhesive choice will change significantly.
As for the gear, don’t just wing it with whatever is in the junk drawer. A solid tiling tools checklist is your best friend here. You’ll definitely need a notched trowel, a manual tile cutter (or a wet saw if you’re feeling ambitious), a rubber grout float, and plenty of spacers. I always keep a sponge and a bucket of clean water nearby; nothing ruins a job faster than trying to clean grout with a dirty rag. Get the right tools upfront, and you’ll save yourself a massive headache halfway through.
Mastering Kitchen Backsplash Materials and How to Cut Tiles for Backsplash
Before you start sticking anything to your wall, you need to pick your fighter. When looking at kitchen backsplash materials, don’t just go for what looks good on Pinterest; think about how you actually live. If you’re a heavy cook who deals with grease splatters daily, a smooth ceramic or porcelain tile is your best friend because it wipes down in seconds. Avoid anything too textured or porous if you don’t want to spend your weekends scrubbing grime out of tiny crevices. I usually lean toward subway tiles—they’re affordable, forgiving if you mess up a cut, and they never go out of style.
Now, let’s talk about the part that usually makes people sweat: the cutting. Learning how to cut tiles for backsplash isn’t about being a master craftsman; it’s about having the right approach. For straight lines, a manual snap cutter is all you really need, but if you’re dealing with outlets or tricky corners, you’ll want a wet saw to prevent cracking. My biggest piece of advice? Measure twice and cut once, then measure a third time just to be safe. A little patience during the cutting phase saves you from a massive headache (and a trip back to the hardware store) later.
Five Ways to Keep Your Backsplash from Turning Into a Disaster
- Don’t skip the dry layout. Before you even touch the thin-set, lay your tiles out on the counter or tape them to the wall. It’s the only way to catch those awkward, tiny slivers of tile at the edges before they become permanent mistakes.
- Keep your spacers organized. I used to just toss them in a pile, but they always end up stuck in the grout or lost under the stove. Keep them in a small container or even an old egg carton so you aren’t hunting for them mid-job.
- Clean as you go. If grout gets on the face of your tiles and dries, you’re going to be scrubbing for hours with a toothbrush. Keep a damp sponge handy and wipe the tile faces down every time you finish a section.
- Watch your grout consistency. You’re aiming for something like peanut butter—not a runny soup and not a dry powder. If it’s too thin, it’ll crack; if it’s too thick, it won’t settle into the joints properly.
- Protect your counters. If you’re working on granite or quartz, cover it with heavy cardboard or a drop cloth. Thin-set is a nightmare to scrape off once it hardens, and I’ve seen too many people ruin a good countertop because they were being “careful” but not actually prepared.
The Bottom Line
Don’t let perfectionism paralyze you; a few slight variations in your grout lines are part of the character of a DIY project, so just keep moving forward.
Invest in the right cutting tools and spacers early on, because trying to wing it with cheap equipment is the fastest way to waste money on broken tiles.
Always measure twice and dry-lay your pattern before you touch the adhesive—it’s much easier to fix a layout error on the counter than it is once the tile is stuck to the wall.
## The Reality of the Grind
“A backsplash isn’t about achieving some Pinterest-perfect, showroom finish on your first try; it’s about the satisfaction of looking at your kitchen and knowing you didn’t have to call a contractor to make it functional and yours.”
Owen Silas Vance
The Finish Line
Look, I know your hands probably feel a little stiff and your back is likely aching from leaning over that counter, but you actually did it. You moved from the planning phase, through the messy reality of cutting tiles and spreading thin-set, to a finished product that didn’t exist a few days ago. Just remember that the secret to a professional-looking backsplash isn’t some expensive magic trick; it’s really just about meticulous prep work and having the patience to clean your grout lines before they set. If a couple of tiles are slightly off or a line isn’t perfectly laser-straight, don’t sweat it. Once the grout is cured and the dust is wiped away, nobody is going to be looking for imperfections—they’re just going to see a kitchen that looks finished.
At the end of the day, this project was never just about the ceramic or the grout. It was about proving to yourself that you can take a space that felt “off” and make it yours without waiting for a contractor to show up. We spend so much time feeling like we need permission or a massive budget to improve our lives, but competence is a muscle. Every time you pick up a tool and finish a task, you’re building the confidence to tackle the next thing. So, take a second to actually stand back, grab a coffee, and admire your work. You earned this.
Frequently Asked Questions
What do I do if my kitchen walls aren't perfectly flat or straight?
Look, I’ve dealt with this in almost every rental I’ve lived in—walls are rarely as straight as the blueprints suggest. If your wall is wavy, don’t panic. Use a slightly thicker layer of thin-set mortar to “build out” the low spots and level the tiles. It’s basically just shimmying them into place with the adhesive. Just keep an eye on your horizontal lines; as long as your grout lines stay straight, the eye won’t notice the slight variations.
How do I clean the grout without accidentally scrubbing it right out of the lines?
The trick is to stop thinking about “scrubbing” and start thinking about “soaking.” If you go at it with a stiff brush immediately, you’ll definitely pull the grout right out. Instead, spray a dedicated grout cleaner or a simple baking soda paste and let it sit for ten minutes to do the heavy lifting. When you do clean, use a soft-bristled toothbrush and move in small, circular motions. Work with the grout, not against it.
Is it worth spending the extra money on high-end grout, or is the cheap stuff fine for a first-timer?
Look, I’ve spent enough time restoring old furniture to know that the “cheap” option usually ends up costing you more in frustration. For your first time, skip the absolute bottom-shelf stuff, but don’t feel like you need to drop a fortune on designer brands. Aim for a high-quality, pre-mixed or polymer-modified grout. It’s more forgiving, easier to clean, and won’t crack on you in six months. Invest in the quality; your future self will thank you.