I remember sitting on the floor of my first studio apartment, staring at a window that felt more like a glaring spotlight than a design feature. I had exactly twenty bucks in my pocket and a set of cheap, polyester blinds that looked like they belonged in a high school cafeteria. I wanted that cozy, lived-in look I saw in magazines, but every time I looked at the price tags for custom drapery, I felt like I was being extorted just to cover a piece of glass. That’s when I realized that making your own diy curtains isn’t about being a master seamstress; it’s about refusing to pay a premium for something you can easily do yourself with a bit of patience.
In this guide, I’m stripping away the intimidation factor and showing you how to get professional results on a renter’s budget. We aren’t going to get bogged down in complex tailoring or expensive machinery that you’ll never use again. Instead, I’ll walk you through the exact, no-nonsense steps to measure your windows, pick the right fabric, and finish your project without the stress. Let’s stop overpaying for window decor and just start making it happen.
Table of Contents
- Step-by-Step Instructions
- Measuring Windows for Curtains Without the Guesswork
- Fabric Selection for Window Treatments That Actually Last
- Pro Moves to Keep Your Curtains from Looking Like a Craft Project
- The Bottom Line on Your DIY Curtains
- The Real Value of a DIY Project
- Finishing the Job
- Frequently Asked Questions
Guide Overview
Tools & Supplies
- Sewing machine for stitching hems and side seams
- Fabric scissors for precise cutting
- Measuring tape for window and fabric dimensions
- Iron for pressing seams flat
- Fabric (2-3 yards depending on window size)
- Thread (1 spool matching fabric color)
- Sewing pins (1 box)
- Curtain rod (1 set)
Step-by-Step Instructions
- 1. First, you need to grab your fabric and do some math. Don’t just eyeball it; that’s how you end up with curtains that look like dollhouse scraps. Measure your window width and multiply it by two (or even two and a half if you want those nice, deep folds). For the length, measure from your rod to where you want the fabric to hit—the floor, the sill, or mid-wall—and then add about 8 to 10 inches to account for the top hem and the bottom weight.
- 2. Once you have your measurements, it’s time to cut. Lay your fabric out on a flat surface, like a clean floor or a dining table, and use a piece of chalk or a fabric marker to trace your lines. If you’re working with patterned fabric, pay close attention to the direction of the print so your curtains don’t end up looking crooked once they’re hanging. Use sharp fabric shears for this; dull scissors will chew up the edges and make your life much harder.
- 3. Now we tackle the top hem, which is where the curtain actually attaches to the rod. Fold the top edge down about half an inch and press it with an iron to create a crisp line, then fold it down again to your desired width (usually around 3 inches for a standard rod pocket). Pin it in place. I always say, ironing is your best friend here—it makes the sewing part feel way less intimidating because the fabric stays exactly where you want it.
- 4. Time to get the sewing machine moving. If you’re using a rod pocket, just sew a straight line along that bottom fold you just created. If you want a more “pro” look with curtain rings, you might want to sew up a small “channel” at the top instead. Just keep your stitch length consistent and don’t try to rush through it. If you’re nervous about the machine, just start on a scrap piece of the same fabric first to get the tension right.
- 5. Next, we deal with the sides and the bottom to give the curtains some structure. Fold the vertical edges inward by about half an inch, press them flat, and then fold them again by another inch. This “double fold” hides the raw edges of the fabric so they don’t fray. Do the same thing for the bottom hem—I usually go for a wider, heavier hem at the bottom because it helps the curtain hang straight and feel substantial rather than flimsy.
- 6. After you’ve pinned your side and bottom hems, sew them shut with a steady straight stitch. If you’re worried about the machine jamming, make sure you aren’t pulling the fabric too hard; just let the machine’s feed dogs do the work. Once you’re done, trim any loose threads with your scissors. It’s a small detail, but it’s the difference between a project that looks “homemade” and one that looks actually professional.
- 7. The final step is the most rewarding: the installation. Slide your rod through the pockets you created, or hang your rings, and mount them to the wall. If you’re feeling extra, give the fabric one last steam or a quick pass with an iron once they’re hanging to get rid of any fold lines from the cutting process. There you go—a custom window treatment that didn’t cost you a fortune.
Measuring Windows for Curtains Without the Guesswork
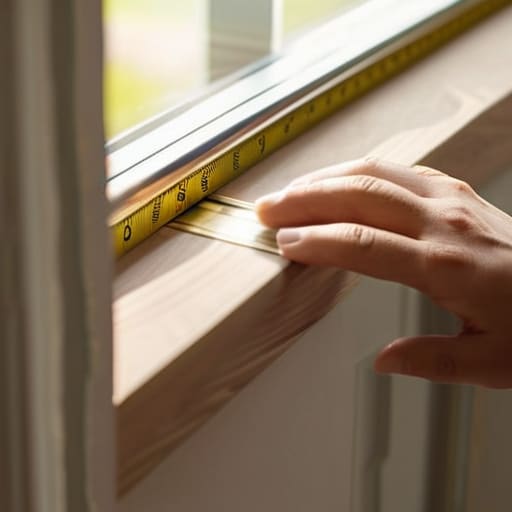
Before you even touch a pair of scissors, you need to get your measurements right. I’ve learned the hard way that “eyeballing it” is a recipe for a room that feels cramped or unfinished. When you’re measuring windows for curtains, don’t just measure the glass itself. You need to account for the width of the entire window frame plus a few extra inches on each side to give the fabric room to breathe. If you go too narrow, your curtains will look like they’re wearing a straightjacket, and you’ll lose that effortless, high-end look we’re aiming for.
For the length, decide on your vibe first: do you want them to skim the floor, or do you want a dramatic “puddle” effect? If you’re going for a clean, modern look, aim for about half an inch above the floor. This is also the best time to think about your fabric selection for window treatments. Heavy linens hang beautifully but require more precise length calculations, whereas lighter cottons are much more forgiving if your measurements are off by a fraction of an inch. Measure twice, cut once—it’s a cliché for a reason.
Fabric Selection for Window Treatments That Actually Last
When it comes to fabric selection for window treatments, your biggest mistake will be picking something that looks good on a bolt but fails in your actual room. If you’re looking for that heavy, high-end look without the custom price tag, go for a linen blend or a structured cotton duck. These materials have enough weight to hang straight and won’t look like flimsy sheets hanging from your ceiling. If you’re working with a tight budget, don’t overlook the thrift store; I’ve found some incredible heavy-weight velvets that just need a good steam to look like they cost hundreds.
Keep in mind that the light in your room changes everything. A thin, sheer fabric will brighten a dark corner, but if you’re trying to block out the morning sun so you can actually sleep, you’ll need something denser. If you aren’t ready to master complex sewing machine settings, I highly recommend using iron-on hem tape for curtains to finish your edges. It’s a total lifesaver for keeping the lines clean and professional without the headache of a sewing machine.
Pro Moves to Keep Your Curtains from Looking Like a Craft Project
- Don’t skimp on the hem; a heavy, double-folded hem at the bottom gives your fabric enough weight to hang straight instead of fluttering like a cheap sheet.
- Always account for “fullness”—if your window is 40 inches wide, don’t just buy 40 inches of fabric, or you’ll end up with a flat, sad-looking sheet; aim for at least 1.5 to 2 times the width of the window.
- Use iron-on hem tape if you aren’t confident with a sewing machine yet; it’s a total lifesaver for getting those clean, crisp lines without the stress of a needle and thread.
- Check your light levels before you commit to a fabric; if you want privacy without living in a cave, look for a mid-weight linen blend that lets some glow through but still masks the view from outside.
- Test your hardware first—make sure your rod is anchored into a stud or uses heavy-duty drywall anchors, because nothing kills the “adulting” vibe faster than a curtain rod crashing down at 2 AM.
The Bottom Line on Your DIY Curtains
Don’t skimp on the measurements—an extra inch of fabric is much cheaper than realizing your new curtains look like they’re shrinking away from the window.
Prioritize durable, easy-to-wash fabrics over “aesthetic” materials that will fall apart after one season of real-world use.
Focus on the process, not perfection; a slightly uneven hem won’t ruin the room, but the confidence you gain from doing it yourself will stick.
The Real Value of a DIY Project
“At the end of the day, a custom curtain isn’t just about covering a window; it’s about the quiet satisfaction of knowing you didn’t have to pay a premium just to make a rental feel like a home.”
Owen Silas Vance
Finishing the Job
At the end of the day, making your own curtains comes down to three things: getting your measurements right, picking a fabric that won’t fall apart after one wash, and actually committing to the process. I know it feels like a lot when you’re staring at a pile of raw fabric and a sewing machine that’s been sitting in your closet for months, but once you move past the initial intimidation, it’s just a series of small, manageable tasks. You’ve done the hard part by planning it out; now you just need to execute. Remember, it doesn’t have to be a museum-quality masterpiece to be a success—it just needs to fit your windows and your budget.
I’ve spent a lot of my life fixing things that were broken or making do with what I could afford, and if there’s one thing I’ve learned, it’s that there is a specific kind of pride that comes from looking around a room and knowing you built it. Don’t let the fear of a crooked hem stop you from starting. Even if your first attempt isn’t perfect, you’ve gained a new skill and saved a decent chunk of change in the process. Stop waiting for the “perfect” moment or the “perfect” setup to start DIYing your life. Just grab your multi-tool, clear off your workspace, and get to work.
Frequently Asked Questions
How do I attach the curtains to the rod if I'm not using a sewing machine for a hem?
If you’re skipping the sewing machine, don’t sweat it. Honestly, I use iron-on hem tape (like Stitch Witchery) for most of my quick fixes. You just fold your fabric, lay the tape in the crease, and press it with an iron. It’s clean, fast, and holds up surprisingly well. If you want something even more temporary, heavy-duty fabric glue works, but just be careful with the placement so it doesn’t look messy.
What’s the best way to make sure my DIY curtains don't look "cheap" or uneven once they're hanging?
The “cheap” look usually comes down to two things: sagging hems and uneven lengths. To avoid this, don’t eyeball your hemline. Use a heavy-duty iron to press your folds crisp before you even touch the sewing machine—it makes a massive difference in how professional the fabric hangs. Also, always hang your curtain rods first, then pin your fabric to the rod. Measuring while they’re actually hanging ensures your floor length is dead-on.
Do I need to worry about the fabric shrinking after the first wash, and how do I prevent that?
It’s a valid worry—nobody wants their hard work to turn into a bunch of tiny, wrinkled rags after one wash. If you’re using natural fibers like cotton or linen, they will shrink. My rule of thumb? Pre-wash your fabric exactly how you plan to clean the curtains later. Run it through a cycle, dry it, and let it settle before you even touch your scissors. It’s an extra step, but it saves a massive headache later.