I was staring at this beat-up, mid-century armchair I found on the curb last Tuesday, wondering if I was about to waste my entire weekend on a total disaster. Most people look at a sagging seat and a torn fabric and think they need to hire a professional or just toss it in the landfill, but that’s a lie. Learning how to reupholster a chair isn’t some elite craft reserved for people with expensive workshops and decades of experience; it’s just a series of small, manageable steps. I’ve spent more nights than I’d like to admit covered in foam dust and fighting with staple guns, and I can tell you firsthand that the learning curve is much shorter than the internet makes it out to be.
In this guide, I’m stripping away the intimidation factor and giving you the actual, unpolished process. I won’t bore you with overly technical jargon or tell you that you need a thousand-dollar toolkit to get started. Instead, I’ll show you how to pick the right fabric, how to avoid those annoying lumps in the padding, and how to get a clean, professional finish on a budget. Let’s stop letting good furniture go to waste and just get to work.
Table of Contents
Guide Overview
Tools & Supplies
- Staple gun and staples for securing fabric
- Pliers for pulling staples and adjusting fabric
- Scissors or fabric shears for cutting material
- Measuring tape for calculating fabric dimensions
- Upholstery needle and heavy-duty thread for sewing
- Upholstery fabric (2-3 yards depending on chair size)
- High-density foam padding (1-2 sheets)
- Batting or polyester wadding (1 roll)
- Replacement webbing or springs (if needed)
- Decorative trim or nailhead trim (optional)
Step-by-Step Instructions
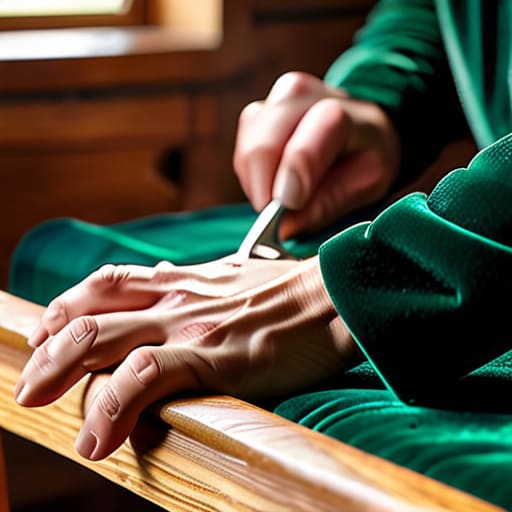
- 1. Before you even touch a staple gun, you need to deconstruct the chair systematically. Don’t just rip everything off in a frenzy; you’ll regret it later. Carefully remove the old fabric, pulling it away in large sections if possible. I always use a flathead screwdriver to gently pry up the old staples without gouging the wood. Keep the old fabric pieces in a neat pile—they are basically your blueprints for the new layer.
- 2. Once the frame is bare, take a second to inspect the “bones.” This is the perfect time to tighten any loose screws or sand down any rough spots on the wood that might snag your new fabric. If the seat cushion feels like it’s made of compressed cardboard, don’t try to save it. Go to a local upholstery shop or even a craft store and grab a piece of high-density foam. It’s a small investment that makes the difference between a chair that looks good and a chair that actually feels good to sit in.
- 3. Now, let’s talk about the fabric. You want something durable, but don’t feel like you have to drop a paycheck on designer velvet. I usually hunt for heavy-duty cotton blends or even canvas. Lay your new fabric face down on a clean floor, place the chair seat upside down on top of it, and center it carefully. You want enough excess fabric on all sides to wrap around the frame, so don’t be afraid to cut it a bit large; you can always trim the excess later, but you can’t add more if you’re short.
- 4. This is where the real work begins: the stapling. Start by pulling the fabric taut—not “guitar string” tight, just firm and even—and place one staple in the center of each of the four sides. This creates your anchor points. Once those are set, work your way from the center out toward the corners, alternating sides as you go. If you see the fabric bunching or wrinkling, stop, pull it tight, and re-adjust before you staple. Consistency here is what prevents that “homemade” look.
- 5. The corners are where most people mess up, so take your time. Don’t just fold the fabric over like a piece of wrapping paper. You need to create neat, overlapping pleats so the material lays flat against the underside of the frame. I like to tuck the excess into the crevices of the chair frame to keep things looking clean. If you find yourself fighting a massive lump of fabric, just pull it tighter and try a different fold direction.
- 6. Once you’ve worked your way around all the edges, take a pair of heavy-duty shears and trim away any dangling bits of fabric or loose threads. If you’re working on a chair with a backrest, you might want to use a little bit of spray adhesive to keep the fabric from sliding around while you’re stapling the sides. It’s a small extra step that keeps the tension even and prevents those annoying little bubbles from forming under the surface.
- 7. Finally, do a “stress test.” Sit in the chair, move around a bit, and check the underside to make sure no staples are sticking out or feeling loose. If everything feels solid, you’re done. You just took a piece of “junk” and turned it into a functional part of your home without spending a fortune on a professional. Take a photo for your records, and move on to the next project.
Essential Upholstery Tools for Beginners to Get Started
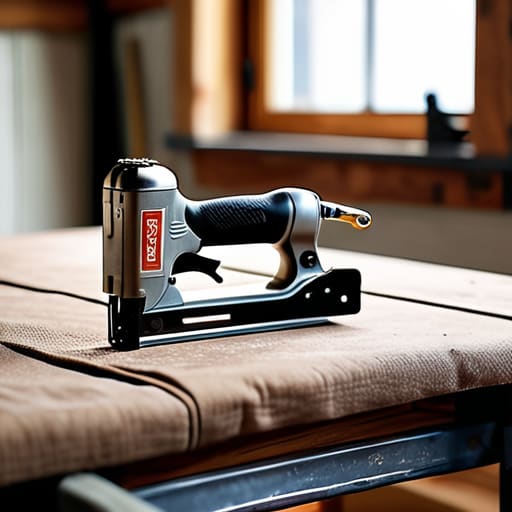
Look, you don’t need a professional workshop to do this, but you do need a few specific pieces of gear so you aren’t fighting your furniture the whole time. My first piece of advice? Don’t cheap out on the staple gun. I’ve spent way too many hours struggling with those flimsy plastic ones that jam every three staples. Grab a decent manual or electric one; it makes a massive difference when you’re working on tight corners. Along with that, make sure you have a heavy-duty pair of pliers. You’ll need them for removing old upholstery fabric and pulling out those stubborn, bent staples that the previous owner left behind.
When it comes to the actual materials, think about longevity over how “aesthetic” the swatch looks in the store. If you’re working on a high-traffic seat, you want a heavy-duty weave. While I love a good velvet, the best fabric for chair seats is usually something with a high Martindale rub count—basically, something that won’t thin out after a month of sitting. Also, if the seat feels like sitting on a brick, don’t skip the upholstery foam replacement guide I’ve mentioned in my notes; fresh foam is what actually makes a chair feel “new” rather than just looking new.
The Right Way to Start Removing Old Upholstery Fabric
Before you go tearing into that fabric like you’re prepping for a demolition project, slow down. The biggest mistake I see people make is just ripping everything off in one go. If you do that, you lose your “map.” I always tell myself to treat the old fabric like a blueprint; it shows you exactly where the original maker placed the staples and how the tension was distributed. When you’re removing old upholstery fabric, try to peel it back in sections. This way, you can see the underlying structure and realize if there’s any hidden damage to the frame before you get too deep into the project.
While you’re stripping the chair down, take a close look at what’s underneath. If the padding feels crunchy or looks like it’s crumbling into dust, don’t try to save it. This is the perfect time to consult an upholstery foam replacement guide to see if you need to swap out the old stuff for something more supportive. It’s a bit more work upfront, but if you’re going to do this, you might as well do it right so the chair actually feels good to sit in.
5 Pro Moves to Keep You From Ruining Your Fabric
- Keep your old fabric scraps organized like your life depends on it. I know it looks like a pile of trash, but those scraps are your roadmap—they show you exactly where the old staples were and how the original shape was constructed.
- Don’t go overboard with the tension. It’s tempting to pull that new fabric until your arms ache, but if you pull too tight, you’ll end up with puckers and weird ripples that make the whole chair look amateur. Aim for smooth, not skin-tight.
- Always test your fabric on a scrap first. Before you commit to the actual chair, take a small piece of your new material and try a few staple shots to see how it reacts. Some heavy canvases or delicate linens behave differently under a staple gun than you might expect.
- Work in sections, not all at once. If you try to wrap the entire chair in one go, you’re going to lose control of the alignment. Start with the center of each side, pull it taut, and then work your way toward the corners to keep everything symmetrical.
- Mind the corners—they are the final boss of upholstery. Don’t just bunch the fabric up; take the time to fold it neatly into pleats. It’s the difference between a chair that looks like a DIY project and one that looks like it came from a showroom.
The Bottom Line
Don’t rush the teardown; keeping your old fabric and foam as a template is the difference between a perfect fit and a wasted afternoon.
You don’t need a workshop full of industrial machinery, just a solid staple gun, a sharp utility knife, and a bit of patience.
Aim for progress, not perfection—the goal is a functional, comfortable seat that looks great, not a museum-grade restoration.
The Real Value of a DIY Project
“You aren’t just swapping out old fabric for something new; you’re taking something the world deemed ‘disposable’ and proving it still has a seat at the table. That’s the real win.”
Owen Silas Vance
The Finished Product
At the end of the day, reupholstering a chair isn’t about achieving some impossible, museum-quality perfection on your first try. It’s about the process: getting your tools lined up, stripping back the old layers, and carefully pulling that new fabric taut. You’ve navigated the tricky parts, from choosing the right foam to mastering the staple gun, and you didn’t need a professional workshop to do it. Just remember that the secret is in the patience you show during those final, repetitive stretches of fabric. If a corner looks a little wonky, don’t sweat it; you’ve already done the hard part by actually finishing the job instead of letting that chair sit in the corner gathering dust.
I know it can feel intimidating when you’re staring at a pile of scrap fabric and a stripped-down wooden frame, but that’s exactly where the growth happens. Every time I pick up a thrifted piece, I’m reminded that we don’t have to be defined by what we can afford to buy new. We can build, fix, and improve our own lives with our own two hands. Stop waiting for the “perfect” moment or the “right” amount of experience to start your first project. Just grab your multi-tool, clear off your kitchen table, and start making things. You’ve got this.
Frequently Asked Questions
How much extra fabric should I actually buy so I don't run out halfway through?
The golden rule? Always buy an extra yard. I know, it feels like throwing money away, but trust me—nothing kills the momentum like being two inches short of a finished seam. You need that buffer for mistakes, pattern matching, or if the fabric shifts unexpectedly. If you’re working with a loud, directional print, grab two extra yards just to be safe. It’s much cheaper to have leftovers than to realize you’ve botched the whole project.
Is it worth it to replace the foam and padding, or can I just reuse what’s already there?
Look, if the old foam feels like a pancake or crumbles when you touch it, toss it. Reusing old padding is a recipe for a chair that looks great but feels like sitting on a brick. If you’ve got the budget, replacing the foam is the best way to actually make the piece functional again. But if you’re tight on cash, just make sure the existing stuff is still firm and intact.
What do I do if the chair has a complicated shape or a lot of tight corners?
This is where most people get intimidated and want to call a professional, but don’t sweat it. If you’re dealing with tight curves or weird angles, stop trying to pull one massive piece of fabric over everything. Instead, work in smaller sections. Use your multi-tool or a pair of snips to make small, strategic relief cuts in the excess fabric. This lets you tuck and staple more precisely without the material bunching up and looking messy.