You don’t need a $500 professional bead kit or a studio that looks like a Pinterest board to start making something decent. Honestly, most of the “pro” tutorials online make diy jewelry making look like some high-stakes engineering project, complete with specialized torches and expensive gemstones that’ll break your budget before you even finish a single bracelet. I learned early on, growing up in a cramped apartment where we had to make do with what we had, that you don’t need a massive inheritance to create something that actually looks good. You just need a few basic tools, some patience, and the guts to mess up a few pieces along the way.
In this guide, I’m stripping away the gatekeeping and the fancy jargon. I’m going to show you how to pick out the right foundational tools, how to work with materials that won’t turn your skin green, and how to assemble pieces that actually last. No fluff, no expensive aesthetic requirements—just the straightforward steps you need to start building your own collection without overcomplicating the process. Let’s get to work.
Table of Contents
- Step-by-Step Instructions
- The Bare Essentials Essential Bead Supplies and Tools
- Mastering Jewelry Making Techniques for Hobbyists Without the Fluff
- 5 Ways to Keep Your Jewelry Projects from Turning Into a Mess
- The Bottom Line
- ## The Real Value of Making
- Don't Let the Perfectionism Stop You
- Frequently Asked Questions
Guide Overview
Tools & Supplies
- Needle-nose pliers for gripping and bending wire
- Wire cutters for trimming metal and cord
- Beading mat to prevent rolling
- Assorted beads (approx. 50-100 pieces)
- Jewelry wire or elastic cord (1-2 meters)
- Lobster clasps and jump rings (set of 5-10)
Step-by-Step Instructions
- 1. First, clear off a flat surface—a desk or even a kitchen table works—and lay down a piece of felt or a thick towel. I learned this the hard way when I lost a handful of tiny jump rings to the crack in my floorboards during my first attempt. The fabric keeps the beads from rolling away and makes it much easier to grab what you need without a headache.
- 2. Sort your supplies into small containers or even old egg cartons to keep things organized. You’ll need a basic set of pliers (needle-nose is best), some wire or cord, and your beads. Don’t feel like you need to buy a professional-grade jeweler’s kit right away; start with what you have or grab some inexpensive basics from a craft store to see if you actually enjoy the process.
- 3. Decide on your layout before you touch any wire. I like to lay my beads out in a straight line on the table to visualize the pattern and the length. This prevents that annoying moment where you realize halfway through that you’ve run out of your favorite color or the necklace is way too short for your neck.
- 4. Once your pattern is set, cut your wire or cord to about two inches longer than your intended finished length. This extra bit gives you the “wiggle room” needed to manipulate the ends without feeling like you’re fighting the material. If you’re working with metal wire, make sure you use a dedicated wire cutter so you don’t leave jagged, sharp edges that’ll snag your clothes later.
- 5. Thread your beads onto the wire, following the pattern you mapped out in step three. As you go, keep an eye on the tension; you don’t want it so tight that the beads can’t move, but not so loose that the whole thing looks sloppy and unfinished. It’s all about finding that middle ground where the piece feels substantial but fluid.
- 6. Secure the ends using a crimp bead or a simple knot, depending on what material you’re using. If you’re using cord, a double knot followed by a tiny dab of clear glue is a lifesaver. If you’re using wire, use your pliers to loop the end and tuck it back in securely. This is the most critical part because if the ends fail, the whole project is toast, so take your time here.
- 7. Give your new piece a final inspection by wearing it or holding it up to a mirror. Check for any sharp edges or loose beads that might pop off. If everything looks solid, you’re done. Don’t aim for perfection—aim for something you actually want to wear—and move on to your next project.
The Bare Essentials Essential Bead Supplies and Tools
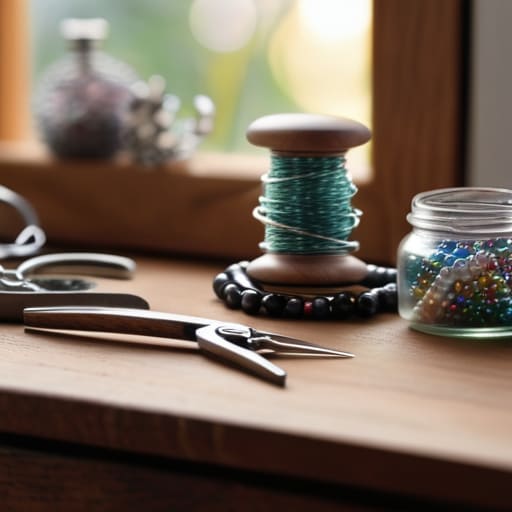
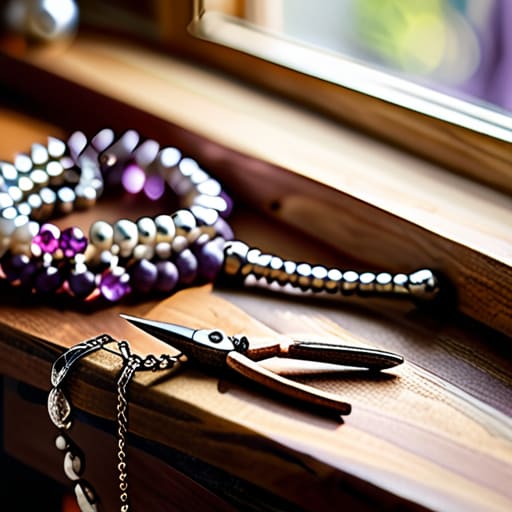
Look, you don’t need to walk into a craft store and drop a hundred bucks on a massive, pre-packaged kit just to get started. Most of those kits come with half a dozen tools you’ll never actually touch. If you want to master essential bead supplies without the waste, start with a basic set of pliers: needle-nose, round-nose, and a pair of wire cutters. That’s it. I’ve learned from my own furniture restoration projects that having the right, simple tool for the specific job is way better than having twenty mediocre ones cluttering your desk.
When you’re looking for jewelry making tools for beginners, focus on quality over quantity. A decent pair of crimping pliers will save you a massive headache when you’re trying to secure your clasps. I also suggest grabbing a small bead mat or even just a piece of felt; it keeps your beads from rolling off the table and onto the floor every time you look away. It’s these small, practical habits that turn a messy hobby into a smooth process. Keep your workspace organized, keep your tools sharp, and don’t let the sheer volume of options paralyze you.
Mastering Jewelry Making Techniques for Hobbyists Without the Fluff
Once you’ve got your basic kit spread out on the table, the biggest mistake I see is trying to jump straight into complex, multi-layered necklaces. It’s a recipe for frustration and wasted materials. Instead, focus on mastering the fundamentals of tension and loop consistency. If you’re looking at how to make beaded bracelets that actually last, pay close attention to how you secure your crimp beads. If they’re too loose, the bracelet will stretch out and fall apart within a week; if you squeeze them too hard with your pliers, you might snap the wire entirely. It’s all about finding that steady hand and consistent pressure.
Don’t feel like you need a professional studio to experiment with new looks. I often find that the best jewelry design ideas come from just playing around with different textures—mixing matte glass beads with a bit of polished metal. If you want to level up without buying a massive new kit, try a simple wire wrapping tutorial using some leftover copper wire from an old project. It’s a low-stakes way to learn how to shape metal without the intimidating price tag of high-end components.
5 Ways to Keep Your Jewelry Projects from Turning Into a Mess
- Don’t buy everything at once. I know those massive, color-coded bead kits look tempting, but they’re usually full of cheap plastic that breaks easily. Start with a few high-quality glass or stone beads and see what you actually enjoy working with before you dump fifty bucks into a bin of junk.
- Organize as you go, not after. If you leave your pliers, wire, and loose beads scattered across your kitchen table, you’re going to lose something important or end up frustrated. Grab a cheap tackle box or even some muffin tins to keep your components separated while you work.
- Watch your tension. When you’re threading beads or wrapping wire, it’s easy to pull too tight and snap the cord, or leave it too loose so the piece looks limp. Aim for a steady, even tension—think of it like tightening a screw on a chair leg; you want it secure, not forced.
- Test your closures before you call it finished. There is nothing worse than spending an hour on a necklace only to realize the clasp is too flimsy to hold the weight. Give it a gentle tug to make sure the hardware can actually handle the piece you’ve built.
- Embrace the “ugly” phase. Your first few attempts are probably going to look a little wonky, and that’s fine. Jewelry making is a muscle you build through repetition. If a design isn’t working, take it apart, look at where the flow went wrong, and try again. That’s how you actually learn.
The Bottom Line
Don’t get paralyzed by the “pro” gear; start with the basics you already have or can grab cheaply, and upgrade only when you actually feel the limitation.
Focus on mastering one single technique—like a solid crimp or a clean loop—before you try to tackle complex, multi-layered designs.
Perfection is a trap that kills hobbies; if a piece isn’t “Instagram-perfect,” wear it anyway and learn from the mistakes on the next one.
## The Real Value of Making
“Forget the idea that you need a studio full of expensive equipment to create something meaningful. At the end of the day, jewelry making isn’t about having the perfect setup; it’s about the confidence you gain when you realize you can actually take a handful of beads and a pair of pliers and turn them into something that belongs to you.”
Owen Silas Vance
Don't Let the Perfectionism Stop You
Look, I know it feels like you need a professional studio and a mountain of expensive gemstones to actually make something wearable, but that’s just not true. We’ve covered the basics: you need the right pliers, a solid grasp on your tension, and a curated selection of beads that actually speak to your style. You don’t need to master every single intricate knot or complex wire-wrapping technique on day one. The goal isn’t to compete with high-end boutique brands; it’s about learning how to use your hands to turn a handful of supplies into something that feels uniquely yours. Just focus on the fundamentals, keep your workspace organized, and don’t sweat the small mistakes that happen when you’re first learning the ropes.
At the end of the day, jewelry making is just another way to reclaim a bit of control over your environment and your budget. There is something incredibly grounding about sitting down after a long shift, putting your phone away, and actually building something tangible with your own two hands. Whether you end up with a masterpiece or a slightly wonky bracelet that you end up giving to a friend, you’ve gained a new skill. Stop waiting for the “perfect” moment or the “perfect” kit to arrive. Grab what you have, sit down at your table, and just start making something.
Frequently Asked Questions
How do I stop my bracelets from snapping or breaking after just a few wears?
The short answer? You’re likely using thread that’s too thin or skipping the reinforcement step. If you’re using elastic, don’t just knot it and walk away. Use a surgeon’s knot, add a tiny drop of clear jewelry glue to the tie, and let it cure completely before wearing it. Also, check your cord tension—if it’s too tight, it’ll snap; too loose, and it’ll stretch out and fray. Build it to last, not just to look good.
Is it actually worth buying more expensive metal findings, or can I get away with the cheap stuff from a craft store?
Look, I get the temptation to grab the cheapest bulk packs, but here’s the reality: cheap findings are a headache waiting to happen. I’ve spent way too many hours untangling jump rings that snapped or dealing with earring posts that turned my skin green. If you’re making something to wear daily, invest in sterling silver or gold-filled components. It’s a higher upfront cost, but it saves you from the frustration of your hard work falling apart.
Where do I find decent beads without spending my entire paycheck on a single project?
Look, I get it. You walk into a boutique bead shop and suddenly a single strand of glass costs more than my weekly grocery budget. Don’t do it. If you’re just starting, skip the high-end gemstone shops. Hit up local thrift stores for old costume jewelry you can deconstruct, or scour Facebook Marketplace for “craft lots.” Honestly, even Amazon or Temu works for bulk basics if you aren’t picky about brand names. Just buy small batches until you know what you actually like.