I still remember the first time I tried to make my tiny studio feel like a home, only to end up staring at a massive hole in the drywall and a very unhappy landlord. I had spent way too much money on “aesthetic” pieces that looked great in photos but felt completely temporary and cheap in person. There’s this annoying myth floating around social media that renter friendly decor has to mean living in a sterile, beige box or, conversely, covering your walls in tacky command strips that eventually peel the paint right off. Honestly, if you’re waiting for homeownership to finally express yourself, you’re just wasting years of your life living in a space that doesn’t actually feel like yours.
I’m not here to sell you on expensive gadgets or complicated DIY projects that require a degree in construction. Instead, I want to show you how to use my background in urban planning and my obsession with thrifted finds to build a space that feels intentional and solid. I’m going to give you the straightforward, low-stakes tactics I use to upgrade my own rentals without risking my security deposit. Let’s stop overcomplicating the process and just start making this place look good.
Table of Contents
Mastering Damage Free Wall Art Without the Stress
The biggest mistake I see people make is thinking that if they can’t drive a nail into the drywall, they’re stuck with blank, white walls forever. That’s just not true. If you want to hang something heavier than a postcard, you need to look beyond the basic tape. I’ve spent way too many weekends trying to balance frames on bookshelves because I was scared of a tiny hole, but damage free wall art is actually pretty easy once you know the right tools. Command hooks are your best friend here, but the trick is actually reading the weight limits on the back of the package. If you guess wrong, you’re not just losing a picture; you’re looking at a patch job you’ll have to explain to your landlord later.
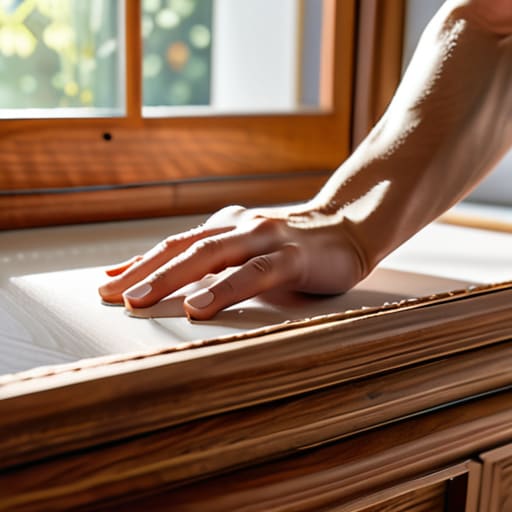
For when you want to go bigger, I always suggest looking into removable wallpaper ideas or even just hanging lightweight tapestries. It adds texture and color without the permanent commitment. If you’re feeling a bit more ambitious, you can even use peel and stick accents in the kitchen to break up that boring, sterile vibe. Just remember: prep the surface first. Wipe that wall down with a little rubbing alcohol so the adhesive actually sticks. It’s a five-minute step that saves you a lot of frustration.
Transforming Walls With Removable Wallpaper Ideas
If you’re staring at a blank, eggshell-white wall and feeling like you’re living in a hospital wing, this is where you fight back. I used to think you needed a professional installer and a massive budget to get that patterned accent wall look, but that’s just gatekeeping. The reality is that removable wallpaper ideas are actually pretty easy to execute if you have a steady hand and a bit of patience. I’m talking about peel-and-stick options that look high-end but come off without taking the drywall with them when you eventually move out.
The trick to making this work without it looking like a DIY disaster is all in the prep. Clean your walls down to the baseboard first—dust is the enemy of adhesion. If you’re working in a kitchen, don’t overlook the potential for a peel and stick backsplash to instantly upgrade the vibe. It’s one of those apartment decorating hacks that feels like a permanent renovation but costs a fraction of the price. Just take your time with the alignment, and you’ll end up with a space that actually feels like home.
Five Low-Stakes Upgrades That Actually Make a Difference
- Swap out the hardware. Those generic, builder-grade cabinet knobs and drawer pulls are usually held on by a single screw. Swap them for something with a bit more character—matte black or brushed brass—and keep the originals in a labeled Ziploc bag so you can switch them back when you move.
- Layer your lighting. Overhead apartment lighting is notoriously harsh and unforgiving. Instead of relying on that one big ceiling fixture, grab a couple of cheap floor lamps or even some smart LED strips to tuck behind your desk or TV. It changes the entire mood of a room without a single renovation.
- Use command hooks for everything, not just art. I use them for kitchen utensils, lightweight organizers, and even hanging up my heavy-duty work apron. Just make sure you follow the “wait 24 hours” rule after sticking them to the wall before you hang anything heavy—trust me, I’ve learned that the hard way.
- Rugs are your secret weapon for hiding ugly floors. If you’re stuck with stained carpet or scratched linoleum, don’t sweat it. A large, low-pile jute or patterned rug covers a massive amount of real estate and instantly makes a cold room feel like a home.
- Bring in some life with low-maintenance greenery. You don’t need a green thumb to make a space feel less sterile. Grab a Pothos or a Snake Plant; they’re incredibly hard to kill and they do a great job of softening those sharp, empty corners that make apartments feel hollow.
The Bottom Line for Your Space
Focus on high-impact, low-risk changes like lighting and textiles that don’t require a single nail to make the room feel less like a temporary dorm and more like a home.
Always test a small, hidden patch of removable wallpaper or adhesive before committing to a whole wall—you don’t want a “renter-friendly” fix turning into a permanent stain.
Prioritize utility over perfection; if a DIY project is going to cost more than your security deposit is worth, just walk away and try a different, cheaper angle.
The Real Goal of Decorating
Your apartment isn’t a permanent museum; it’s a workspace for your life. Don’t let a lease agreement stop you from making a space that actually feels like home—you just have to learn how to build without breaking things.
Owen Silas Vance
Making It Your Own
At the end of the day, decorating a rental isn’t about achieving some untouchable Pinterest perfection; it’s about making the four walls you pay for actually feel like a home. We’ve covered how to swap out the boring stuff, from using command strips to hang art without scarring the drywall, to using peel-and-stick wallpaper to add some much-needed personality. Whether you’re working with a tiny studio or a shared apartment, the goal is to layer in your own style through small, intentional changes. You don’t need a massive renovation budget or a landlord’s permission to stop living in a space that feels temporary and start living in one that feels genuinely yours.
I know it can feel overwhelming when you’re staring at a beige room and a bank account that isn’t exactly overflowing, but remember that competence is a gradual process. You don’t have to fix everything in one weekend. Start with one corner, one shelf, or even just one wall. The most important thing is to stop waiting for “someday” when you finally own a house to start enjoying your environment. You deserve a space that inspires you right now, exactly where you are. So, grab your multi-tool, pick one small project, and just start doing it.
Frequently Asked Questions
How do I know if a specific peel-and-stick wallpaper is actually going to come off clean or if it's going to rip my paint off when I move?
Look, I’ve been there—staring at a roll of wallpaper and wondering if I’m about to lose my security deposit. The safest bet? Always test a small, inconspicuous scrap in a corner or behind a door first. Check the manufacturer’s specs for “low-tack” or “repositionable” labels. If the paper feels cheap and thin, run. You want something with a bit of weight that feels like it has a quality adhesive, not just a sticker.
Are there any command strips or adhesive hooks that can actually handle the weight of a heavy mirror or a chunky framed print?
Look, I’ve learned the hard way that “heavy” is a relative term. If you’re trying to hang a chunky frame or a mirror, skip the standard small strips and go straight for the Command Large Picture Hanging Strips—the ones that look like heavy-duty Velcro. They can handle up to 16 lbs per set. Just remember: clean the wall with rubbing alcohol first. If it’s heavier than that, honestly? Just drill a hole. It’s worth the small patch job later.
If I want to change my lighting but can't touch the ceiling fixtures, what are some ways to get better light without looking like I'm living in a dorm room?
The “big light” is the enemy of a good vibe. If you can’t touch the ceiling, stop trying to. Instead, layer your lighting at different heights. Grab a sleek floor lamp for a corner and a couple of warm-toned table lamps for your surfaces. If you want to get fancy, use battery-operated LED puck lights under cabinets or bookshelves. It adds depth and makes the place feel intentional, not like a dorm.