I was halfway through stripping the finish off an old teak sideboard I’d found on the curb when my chisel finally gave up. I spent twenty minutes hacking away, sweating and frustrated, only to realize the blade wasn’t actually blunt—it just lacked an edge. It’s a classic mistake that makes most people think they need to go out and buy a whole new set of professional gear, but the truth is much simpler. Learning how to sharpen tools isn’t some mystical, high-level craft reserved for master craftsmen; it’s just a fundamental maintenance skill that anyone can master with a little patience and the right rhythm.
I’m not here to sell you a $300 electric grinder or a complicated system that takes up half your workbench. Instead, I’m going to show you how to get a factory-level edge using basic, affordable supplies that won’t break your budget. We’re going to strip away the intimidation factor and walk through the actual, tactile steps of honing your blades so you can stop fighting your materials and start working with them. By the end of this, you’ll have the confidence to keep your kit in top shape without needing a professional to do it for you.
Table of Contents
- Step-by-Step Instructions
- Mastering Whetstone Sharpening Techniques Without the Overcomplication
- Finding Your Sharpening Angle for Different Tools Every Time
- Five Pro-Tips to Keep Your Edge Without Losing Your Mind
- The Bottom Line: Don't Overthink It, Just Get Sharp
- The Real Cost of a Dull Edge
- Getting Your Edge Back
- Frequently Asked Questions
Guide Overview
Tools & Supplies
- Handheld knife (standard kitchen or utility knife)
- Garden shears (bypass pruners or loppers)
- Dual-grit whetstone (1x medium/fine stone)
- Honing rod (1x steel rod)
- Lubricant (1x water or honing oil)
- Microfiber cloth (1x cleaning cloth)
Step-by-Step Instructions
- 1. First, you need to figure out what you’re actually working with. Not every tool gets the same treatment; a kitchen knife needs a fine-grit stone, while a rusted garden trowel might need something much more aggressive. Grab your tools and inspect them for chips or cracks before you even touch a sharpening stone. If the metal is severely damaged, sharpening might not fix it, and you don’t want to waste your time or ruin a good stone.
- 2. Clean everything off. I’ve learned the hard way that trying to sharpen a tool covered in dried sap, grease, or old food is a recipe for a mess. Use some warm soapy water and a stiff brush to get the surface completely clear. You want the metal to be bare so you can actually feel the edge meeting the stone, rather than just grinding dirt into the grit.
- 3. Set up your workspace and prep your stone. If you’re using a whetstone, soak it in water for about ten minutes—or until the bubbles stop rising—to make sure it’s fully saturated. I usually keep a small tray or a damp rag underneath my stone to prevent it from sliding around while I’m working. There’s nothing more frustrating than a stone that shifts mid-stroke when you’re trying to find that perfect angle.
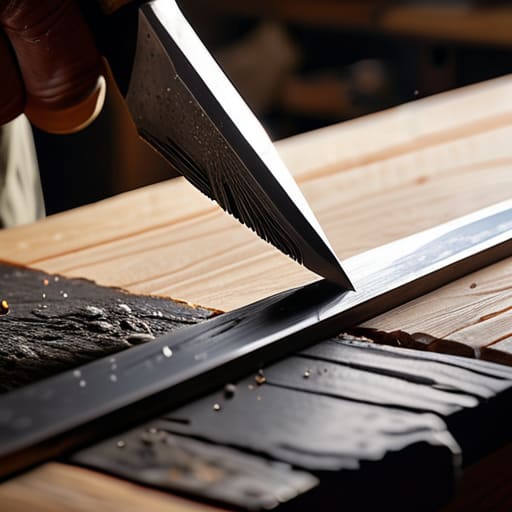
- 4. Find your angle and start the grind. This is the part that intimidates most people, but it’s really just about muscle memory. For most standard blades, you’re looking for about a 20-degree angle. Hold the tool steady and use consistent, light pressure to push the edge across the stone in a sweeping motion. Don’t try to force it; let the grit do the heavy lifting while you focus on maintaining that same slope.
- 5. Work both sides of the edge. A common mistake is only focusing on one side and ending up with a blade that’s lopsided. Once you’ve worked one side, flip the tool and repeat the process on the other. You’re looking to create a “burr”—a tiny, microscopic lip of metal that forms on the opposite side of your stroke. If you feel that slight roughness with your thumb (carefully!), you know you’re actually making progress.
- 6. Refine the edge with a fine grit. Once you’ve done the heavy lifting with the coarse side of your stone, switch to the fine-grit side to smooth everything out. This is where the magic happens and that jagged edge turns into a clean, slicing line. Use lighter, faster strokes here to polish the metal and remove that burr you created in the previous step.
- 7. Test it (safely) and store it right. Before you go hacking away at a new project, test the edge on a piece of scrap paper or a piece of cardboard. If it slices through without snagging, you’re golden. When you’re done, wipe the tool dry immediately to prevent rust from setting in, and put it back in its proper place. A tool left sitting out damp is a tool that’s going to fail you next time you need it.
Mastering Whetstone Sharpening Techniques Without the Overcomplication
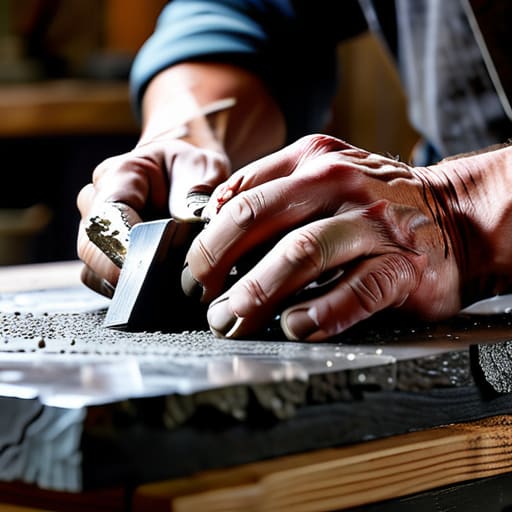
Once you’ve got the basics down, the real trick to not burning yourself out is finding a rhythm. I used to think I needed a massive setup, but honestly, mastering a few specific whetstone sharpening techniques is more about muscle memory than expensive gear. The biggest thing I learned the hard way? Consistency is everything. If you’re wobbling your wrist, you’re just creating a jagged edge that’ll be a nightmare to fix later. Focus on keeping that pressure even and steady; it’s more like a slow, meditative movement than a frantic scrub.
You also need to understand the difference between a quick touch-up and a deep fix. People often get confused about honing steel vs sharpening stone, but here’s the breakdown: a honing steel is just for realigning the edge before you cook, whereas the stone is for actually removing metal to fix a dull blade. If you want to focus on maintaining blade edge longevity, don’t just stop when it feels sharp. Take an extra minute to refine it on a finer grit. It’s that small bit of extra effort that keeps you from having to redo the whole process next week.
Finding Your Sharpening Angle for Different Tools Every Time
One of the biggest mistakes I see people make is treating every blade like it’s the same. If you try to sharpen a heavy-duty woodworking chisel with the same shallow angle you use for a delicate paring knife, you’re going to have a bad time. A good rule of thumb is to look at the tool’s intended job. For heavy-duty stuff like axes or large chisels, you want a steeper, more rugged angle to handle the impact. For your kitchen knives, you’ll want to keep it much slimmer. Finding the right sharpening angle for different tools is really just about matching the edge to the work it’s supposed to do.
I used to struggle with this until I started using a simple trick: a piece of folded cardboard or a specialized guide. It helps you keep that angle consistent so you aren’t wobbling all over the place. Consistency is everything when it comes to maintaining blade edge longevity. If your angle drifts halfway through the process, you’ll end up with a rounded, useless edge instead of a crisp one. Take a second to steady your hand; it’s worth the extra minute.
Five Pro-Tips to Keep Your Edge Without Losing Your Mind
- Don’t skip the cleaning step; if there’s dried sap, rust, or old grease on your blade, you’re just grinding gunk into the metal instead of actually sharpening it.
- Listen to the sound, not just your eyes; a consistent, rhythmic “shing” against the stone means your angle is steady, while a patchy sound means you’re wobbling.
- Stop over-sharpening everything; if a tool is just slightly dull, a quick pass with a honing rod is usually plenty, so you don’t waste away the actual steel.
- Keep your stone wet or oiled depending on what you’re using; a dry stone creates friction heat that can mess with the metal’s temper and makes the whole process a massive headache.
- Test your edge on something cheap, like a piece of scrap cardboard; if it slices through without snagging, you’re good to go—don’t go testing your new edge on your expensive dinner knives first.
The Bottom Line: Don't Overthink It, Just Get Sharp
Stop waiting for the “perfect” setup; a decent stone and a little patience are more important than expensive gear you don’t know how to use.
Consistency is everything—it’s better to hold a steady, simple angle for a minute than to constantly hunt for a “perfect” angle you can’t maintain.
Treat your tools like an investment in your own competence; a sharp blade isn’t just about ease of use, it’s about working safer and getting the job done right the first time.
The Real Cost of a Dull Edge
“A dull tool isn’t just frustrating; it’s a safety hazard and a waste of the time you don’t have. Taking ten minutes to get a clean, precise edge today saves you hours of struggling and a lot of unnecessary sweat tomorrow.”
Owen Silas Vance
Getting Your Edge Back
At the end of the day, sharpening isn’t about achieving some professional-grade perfection or buying a specialized workshop full of expensive gear. It’s really just about three things: finding the right angle for the specific tool in your hand, maintaining a consistent pressure, and being patient enough to let the stone do the heavy lifting. Whether you’re working with a kitchen knife or a rusted chisel from a thrift store find, the goal is the same. Don’t let a little bit of friction or a messy workspace discourage you. Once you master the basics of the whetstone and stop overthinking the process, you’ll realize that keeping your tools in top shape is just another part of a well-maintained life.
I know that looking at a dull, beat-up tool can feel a bit overwhelming, especially when you just want to get the job done and move on. But there’s a quiet kind of satisfaction that comes from taking something broken or inefficient and making it functional again with your own two hands. It’s a small win, sure, but these small wins add up. Stop waiting for the perfect moment or the perfect equipment to start your next project. Just grab your stone, find your rhythm, and start doing the work. You’ve got this.
Frequently Asked Questions
How do I know if a tool is actually sharp or if I’m just getting better at the technique?
It’s easy to mistake muscle memory for a actually sharp edge. Here’s the truth: don’t trust your eyes, trust the physics. If you’re slicing through a piece of paper or a tomato without the blade “tearing” or snagging, you’re winning. If you have to apply downward pressure to make it cut, you haven’t mastered the technique—you just haven’t finished the job. A truly sharp tool should do the work for you.
Is it worth buying an expensive electric sharpener, or should I just stick to manual stones?
Look, if you’re asking this, you’re probably staring at a $200 electric sharpener online and wondering if it’s a shortcut or a scam. Honestly? Stick to the stones. Electric sharpeners are fast, sure, but they’re aggressive—they strip away metal way too quickly and can ruin a good blade if you aren’t careful. Manual stones teach you the actual geometry of the edge. It takes more patience, but it’s cheaper and much more precise.
What do I do if I accidentally mess up the edge and grind away too much metal?
Look, it happens. I’ve definitely gone too far on a thrifted chisel before. If you’ve ground away too much metal, you haven’t necessarily ruined the tool, but you have changed its geometry. You’ll need to reset your bevel at a slightly shallower angle to compensate for the lost material. It takes a bit more time and a lot more patience, but it’s better than tossing a good tool in the scrap bin.