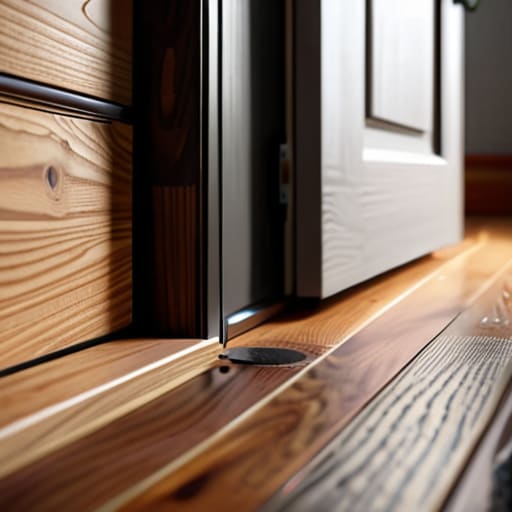
I was sitting on my living room floor last Tuesday, wrapped in a literal blanket and shivering, when I realized my heating bill wasn’t high because of the winter chill—it was high because my front door was basically a giant straw sucking the warmth right out of my apartment. Most people think you need to call an expensive contractor or replace the entire frame to fix a draft, but that’s just a way to gatekeep home maintenance. The truth is, weatherstripping a door is one of those low-effort, high-reward tasks that anyone can tackle with a trip to the hardware store and about twenty minutes of their time.
I’m not here to give you a lecture on thermal dynamics or sell you on some over-engineered, overpriced kit. I want to show you how to identify exactly where the air is escaping and how to seal it up so you can stop throwing money away on utility bills. We’re going to go over the specific materials you actually need, the right way to clean the surface so things actually stick, and the most common mistakes that make the job fail within a week. Let’s just get it done.
Table of Contents
Guide Overview
Tools & Supplies
- Tape measure for measuring door gaps
- Scissors or utility knife for trimming material
- Cleaning cloth for surface preparation
- Weatherstripping roll (adhesive or tension type)
- Rubbing alcohol or cleaner for surface prep
Step-by-Step Instructions
- 1. First, you need to figure out exactly where the air is escaping. Grab a flashlight and a piece of paper, or even just a candle, and run it around the edges of the door on a windy day. If the flame flickers or the paper moves, you’ve found a leak point. Don’t just guess; knowing exactly where the gaps are will save you from buying way more material than you actually need.
- 2. Once you know where the trouble spots are, it’s time to clean the surface. This is the part everyone skips, but if you don’t do it, your new weatherstripping will peel off in a week. Grab some isopropyl alcohol and a clean rag to wipe down the door frame where the seal will sit. You want to get rid of every bit of dust, oil, and old adhesive so the new stuff actually sticks.
- 3. Now, measure twice and cut once—literally. Take your measuring tape and get the exact dimensions of the door jamb. If you’re using adhesive foam or rubber strips, I recommend cutting them slightly longer than the actual space. It’s much easier to trim the excess with your multi-tool or a pair of scissors than it is to try and bridge a gap because your strip was two inches too short.
- 4. Start applying the stripping at the top of the door frame and work your way down. If you’re using the peel-and-stick variety, peel back just a few inches of the backing at a time. This prevents the strip from getting tangled or stuck in the wrong spot. Press down firmly as you go to ensure there are no air pockets trapped underneath the adhesive.
- 5. Pay extra attention to the corners. This is where most DIYers mess up and leave little “windows” for the cold air to sneak through. Overlap your strips slightly at the corners to create a continuous seal. If you have a gap at the very bottom of the door, that’s when you’ll want to look into a door sweep rather than just more foam.
- 6. Once everything is applied, do a final test. Close the door slowly and feel for any resistance. You want the door to feel snug when it latches, but you shouldn’t have to shoulder-charge it to get it to close. If it’s too hard to shut, your stripping is too thick; if you can still feel a breeze, you need to add another layer or a thicker material.
Foam vs Rubber Weatherstripping Picking Your Winning Material
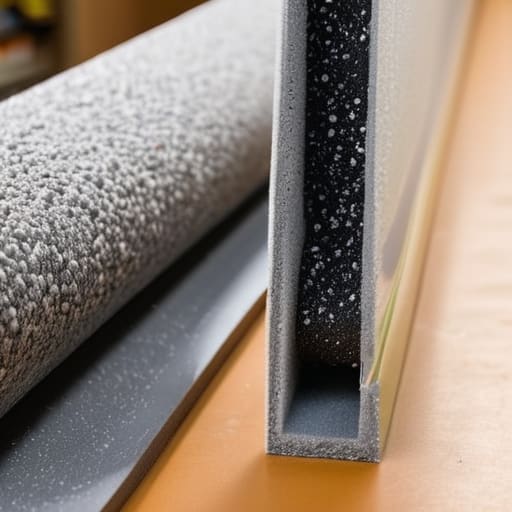
When you’re standing in the hardware aisle, it’s easy to feel overwhelmed by the wall of sticky rolls and plastic strips. Most people default to the cheapest option, but that’s usually a mistake. If you’re looking at foam vs rubber weatherstripping, think about where you’re actually putting it. Foam is great for filling small, irregular gaps because it’s squishy and forgiving, making it a budget-friendly win for minor fixes. However, foam tends to degrade faster when it’s exposed to constant movement or sunlight.
If you want a solution that actually lasts, go with rubber. It’s more resilient, holds its shape much better over time, and is a heavy hitter when it comes to preventing air leaks around doors in high-traffic areas. It might cost a few extra bucks upfront, but it’s a much smarter play for long-term energy efficient home improvements. If your main issue is the gap at the very bottom of the entrance, don’t just stick a strip of foam there; you’ll likely need a proper door sweep to keep the drafts out.
Preventing Air Leaks Around Doors Without the Headache
If you’ve already tackled the sides and the top of your door frame, don’t stop there. The biggest culprit for a drafty room is often the gap right at the floor. I’ve seen so many people spend money on new insulation only to realize they’re still losing heat because of a massive gap under the door. If your door doesn’t sit flush against the threshold, a door sweep replacement guide is probably more useful to you than any fancy sealant. It’s a quick fix that makes a massive difference in how your space actually feels.
Think of this as part of a larger strategy for improving door insulation across your entire place. You don’t need to gut your house or call in a contractor to see results. Sometimes, it’s just about identifying where the air is moving and blocking it. Whether you’re looking into preventing air leaks around doors in your bedroom or the front entryway, the goal is the same: stop the waste. It’s one of those small, low-cost wins that pays for itself by the time your next utility bill arrives.
Pro Tips to Keep Your DIY Job from Falling Apart
- Clean the surface like your security deposit depends on it. If you slap new adhesive onto a layer of old dust or oily residue, that weatherstripping is going to peel off within a week, and you’ll be right back where you started.
- Don’t skimp on the measurement phase. I’ve learned the hard way that “eyeballing it” leads to gaps, and gaps lead to drafts. Use a real tape measure and account for the thickness of the door itself.
- Test the seal with a flashlight. Once you’re done, have someone stand outside with a bright light while you’re inside. If you see light peeking through the cracks, you’ve got a gap that needs more material or a better fit.
- Watch the door swing. If you pack the weatherstripping in too thick, you’ll end up fighting the door every time you try to enter your own house. It should be a snug seal, not a workout.
- Keep your scraps. When you’re cutting the strips to size, keep the offcuts in your multi-tool kit or a small bin. You’ll almost always need a tiny extra piece for a corner or a weird notch you didn’t see coming.
The Bottom Line on Sealing Your Space
Don’t just slap down the cheapest foam you find; invest in a decent rubber seal if you want it to actually last through a season of heavy use.
Treat the inspection like a diagnostic—find the actual gap before you start sticking things down, or you’ll just be wasting time and adhesive.
View weatherstripping as a tiny investment that pays for itself; stopping a draft today is much cheaper than paying a massive heating bill next month.
The Real Cost of a Draft
“A drafty door isn’t just an annoyance; it’s a slow leak in your bank account. You can keep paying to heat the neighborhood, or you can spend twenty bucks and an hour of your time to actually seal the deal.”
Owen Silas Vance
The Bottom Line
At the end of the day, weatherstripping isn’t some high-level home renovation project; it’s just basic maintenance that pays for itself. Whether you decided to go with the budget-friendly foam or invested a little more in the durable rubber, the goal remains the same: stop letting your hard-earned money leak out through the cracks. You’ve cleaned the surface, measured the gaps, and applied the seal. Now, instead of feeling that annoying draft every time you walk past the entryway, you can actually feel the difference in your utility bills and your room temperature. It’s a small win, but it’s a win nonetheless.
I know that looking at a pile of hardware store supplies can feel overwhelming when you’re just trying to keep your life together, but this is how you build competence. You don’t need a massive toolkit or a professional contractor to take control of your living space. Every time you fix something yourself, you’re proving that you don’t have to be a victim of your environment or your expenses. So, grab that multi-tool, finish the job, and take pride in the small stuff. Once you master the door, you’ll realize there’s nothing else in your apartment—or your budget—that you can’t handle.
Frequently Asked Questions
How do I know if my door is actually warped or if it just needs better weatherstripping?
Here’s the easiest way to tell: grab a flashlight and a piece of paper. At night, turn off the lights and shine the flashlight around the door frame. If you see bright light bleeding through gaps, that’s a seal issue. If the light is consistent, you likely just need better weatherstripping. But, if the gap is huge in one specific spot—usually near the middle or bottom—and the door won’t latch right, it’s probably warped.
Can I use this same stuff on my windows, or am I going to mess something up?
Short answer: Yes, but don’t just wing it. The same foam or rubber strips work great for windows, but the application is a bit more delicate. Windows move more often and have tighter tolerances than doors, so if you use something too thick, you’ll struggle to latch them. Grab a tape measure first. If you can force a window shut, you’ve used too much. Aim for a snug seal, not a struggle.
How often do I actually need to replace this stuff before it starts failing?
Honestly, there’s no set calendar for this, but I usually check mine once a year when the seasons shift. If you notice the door isn’t latching right, or if you feel a sudden chill hitting your ankles when you walk by, that’s your sign. Foam tends to crumble and flatten out faster—maybe every two years—while good rubber can last much longer. If it looks cracked or feels brittle, just swap it. Don’t wait for the bill to spike.