I was standing in my tiny kitchen last Tuesday, staring at a pile of coffee grounds and wilted spinach, feeling that familiar guilt of watching money literally rot in my trash can. Most people think you need a massive backyard, a high-tech rotating tumbler, or a degree in biology to start composting, but that’s just more gatekeeping. The truth is, learning how to make a compost bin doesn’t require a massive investment or a perfect garden; it just takes a little bit of spatial awareness and some basic materials you probably already have sitting in your garage.
I’m not here to sell you on some aesthetic, over-engineered lifestyle hack that’s going to break in two months. Instead, I’m going to show you how to build a functional, low-maintenance system that actually works for your specific living situation, whether you have a balcony or a small yard. We’re going to skip the fluff and focus on the mechanics of heat, moisture, and airflow so you can stop wasting scraps and start building your own soil from scratch. Let’s just get it done.
Table of Contents
Guide Overview
Tools & Supplies
- Drill with bits for making aeration holes
- Handsaw for cutting wood or plastic if needed
- Measuring tape for accurate dimensions
- Plastic storage bin (approx. 18-30 gallons)
- Drill bits (small to medium size)
- Hardware cloth or mesh (optional for base)
- Screws or wire (if using a wooden frame)
Step-by-Step Instructions
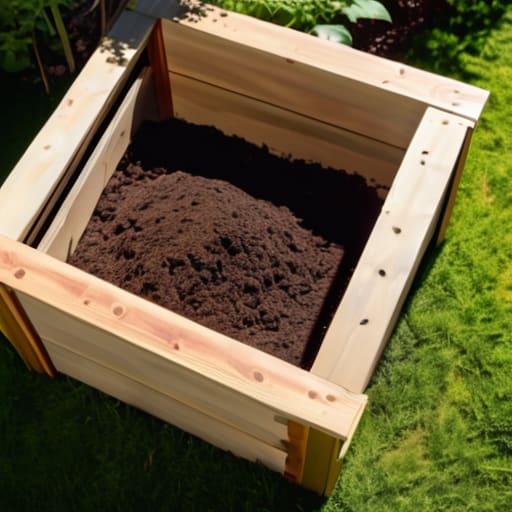
- 1. First, you need to decide where this is actually going to live. If you have a tiny balcony, you’re looking at a small plastic bin with holes drilled in it, but if you have a patch of dirt in a backyard, a wooden crate style is much better. I usually go for a simple pallet bin because you can often find them for free behind hardware stores, and they provide excellent airflow which is the secret to preventing that gross, rotten smell.
- 2. Grab your materials and clear a spot. If you’re building a wooden bin, you’ll need some untreated cedar or pine scraps, a few galvanized screws, and a drill. I always keep my multi-tool handy for this part because sometimes you just need to tweak a screw or trim a piece of wood on the fly. Make sure the ground underneath is bare soil; this allows the worms and beneficial microbes to climb right in and start doing the heavy lifting for you.
- 3. Start layering your “browns” and “greens.” This is where people usually overcomplicate things, but it’s really just a ratio game. You want a thick base of dry, carbon-rich materials like shredded cardboard or dried leaves—these are your “browns.” On top of that, add your kitchen scraps like coffee grounds and veggie peels, which are your “greens.” I like to think of it like building a lasagna where the dry stuff keeps everything from getting too soggy.
- 4. Add a bit of moisture, but don’t soak it. Your compost pile should feel like a wrung-out sponge. If it’s too dry, the decomposition process just stalls out completely. If you notice it looking dusty, grab a watering can and give it a light mist. Getting the moisture level right is probably the most underrated part of keeping the pile alive without having to babysit it constantly.
- 5. Give it a stir every week or two. You don’t need to go overboard, but you do need to introduce oxygen. Use a pitchfork or even just a sturdy stick to turn the pile, moving the stuff from the outside into the middle. This prevents the center from becoming an anaerobic, stinky mess and keeps the microbes happy and working at full speed.
- 6. Keep an eye on the “recipe” as you go. If the pile starts smelling like sulfur, you probably have too many greens or too much moisture; just toss in some more dried leaves or paper. If nothing is happening at all, you’re likely too dry or need more nitrogen, so throw in some more food scraps. It’s all about adjusting on the fly based on what the pile is telling you.
- 7. Wait for the magic to happen. Depending on the weather and how often you turn it, you’ll eventually see a dark, crumbly material that smells like fresh rain. That’s your “black gold.” Once it looks like rich soil and you can’t recognize the original scraps anymore, it’s ready to go straight into your potted plants or garden beds. Just remember: patience is a tool just like any other.
Smart Compost Bin Dimensions and Design for Real Life
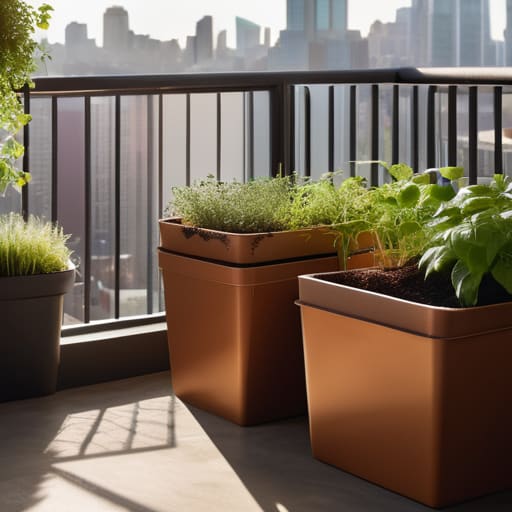
When you’re planning your build, don’t get caught up in “perfect” aesthetics. Since I grew up in a tight rental, I know that space is usually at a premium. If you’re working with a small balcony or a tiny patio, you might want to skip the massive wooden crate and look into a vermicomposting setup instead. Using worms is a total game-changer for urban dwellers because it’s compact, odorless if done right, and incredibly efficient for small-scale organic waste.
If you do have a bit of yard space, keep your compost bin dimensions and design practical. I usually aim for something at least three feet wide; anything smaller loses heat too quickly, which slows down the whole process. You also need to think about airflow. If you pack it too tight, you’ll end up with a stinky mess. I always make sure my design allows for plenty of aeration in compost bins by adding some ventilation gaps or using hardware cloth. It’s all about finding that balance between containing the scraps and letting the pile breathe so the magic actually happens.
Choosing the Best Materials for Backyard Composting
When you’re picking out what to build with, don’t fall into the trap of thinking you need expensive, store-bought kits. I’ve spent way too many weekends scouring thrift stores for wood, and honestly, that’s where the real value is. If you’re looking for the best materials for backyard composting, old cedar fence pickets are your best friend because they resist rot naturally without needing toxic treatments. If you’re on an even tighter budget, even some repurposed wooden pallets can work—just make sure they aren’t treated with heavy chemicals.
The real goal here isn’t just to contain the pile, but to facilitate the organic waste decomposition process. This means your choice of material needs to balance containment with airflow. If you build something too airtight, you’ll end up with a stinky mess. You need to ensure there are gaps or slats to allow for proper aeration in compost bins, which keeps the microbes happy and the smell down. It’s all about finding that sweet spot between a sturdy structure and a breathable environment.
5 Ways to Keep Your Bin From Becoming a Total Mess
- Don’t forget the “Green and Brown” rule. If your bin starts smelling like a swamp, you’ve got too many nitrogen-heavy scraps (greens) and not enough dry carbon (browns). Just toss in some shredded cardboard or dried leaves to balance it out.
- Air is your best friend. If the pile gets too packed down, it’ll go anaerobic and start stinking. Give it a quick stir with a pitchfork or even a sturdy stick once a week to let the oxygen in.
- Size matters for the scraps. You don’t need a wood chipper, but chopping up your vegetable peels and cardboard into smaller pieces helps them break down way faster. It’s a little extra work upfront, but it saves you months of waiting.
- Keep it damp, not soaked. You want your compost to feel like a wrung-out sponge. If it’s bone dry, nothing happens; if it’s dripping wet, it’s going to smell. If it’s looking dry, just give it a quick spray with the hose.
- Watch what you’re throwing in. Avoid meat, dairy, or oily foods. I learned this the hard way when my first DIY bin became a magnet for every neighborhood raccoon. Stick to veggie scraps, coffee grounds, and paper to keep things simple and pest-free.
The Bottom Line
Don’t let the “perfect” setup stop you from starting; a basic bin made from scrap wood or a repurposed container works just as well as an expensive store-bought kit.
Focus on the balance of greens and browns to keep your bin from smelling, because a smelly compost pile is the fastest way to lose motivation.
Treat your compost like a small project—it requires a little bit of regular maintenance, but the payoff for your soil and your wallet is worth the effort.
The Real Purpose of Composting
“Composting isn’t about having a perfect, high-tech garden setup; it’s about closing the loop. It’s taking what you used to call ‘trash’ and turning it into something that actually has value. When you build your own bin, you’re not just managing waste—you’re proving you don’t need a massive budget to be resourceful.”
Owen Silas Vance
Getting Started with Your New Bin
At the end of the day, building a compost bin doesn’t require a degree in environmental science or a massive budget. We’ve covered the essentials: picking the right materials for your specific space, sizing the bin so it actually fits your lifestyle, and ensuring you have a design that stays functional without becoming a chore. Whether you went with a simple wooden crate or a more heavy-duty plastic setup, the goal was always the same—to create a system that works for you, not against you. Just remember to keep an eye on your moisture levels and your carbon-to-nitrogen ratio, and you’ll be turning kitchen scraps into black gold in no time.
I know that starting something new can feel like just another item on an endless to-do list, but I promise the payoff is worth the initial effort. There is a specific kind of quiet satisfaction that comes from seeing something you built with your own hands actually doing something useful for your home and your garden. You’re not just managing waste; you’re closing a loop and taking control of your own footprint. So, grab your multi-tool, get those scraps into the bin, and stop overthinking it. You’ve got this.
Frequently Asked Questions
How do I know if my compost pile is actually working or if it's just turning into a smelly mess?
If it smells like a dumpster, something’s off—usually too much moisture or not enough air. A healthy pile should actually smell like earthy, damp forest floor. To check progress, grab your pitchfork. You’re looking for heat; if the center feels warm, the microbes are working. Also, check the texture. If you see recognizable food scraps after a few weeks, keep turning it. If it’s turning dark and crumbly, you’ve nailed it.
Is there a specific ratio of "green" to "brown" materials I need to keep in mind so it doesn't get too soggy?
Think of it like a recipe: you want roughly three parts “browns” to one part “greens.” If your bin starts smelling like a swamp or looks like a pile of wet sludge, you’ve got too many greens (food scraps/grass). Toss in some shredded cardboard or dried leaves to soak up the moisture. If it’s just sitting there doing nothing, you probably need more greens to kickstart the heat. Balance is everything.
What should I do if I start seeing pests or attracting critters to the bin?
If you start seeing uninvited guests, don’t panic—it usually just means your bin is too “tasty.” First, check your ratios. You probably have too many “greens” (food scraps) and not enough “browns” (dried leaves or cardboard). Adding more carbon helps balance the smell that attracts them. Also, make sure you aren’t tossing meat, dairy, or oils in there; those are basically neon signs for raccoons. Keep it covered, keep it balanced, and keep going.