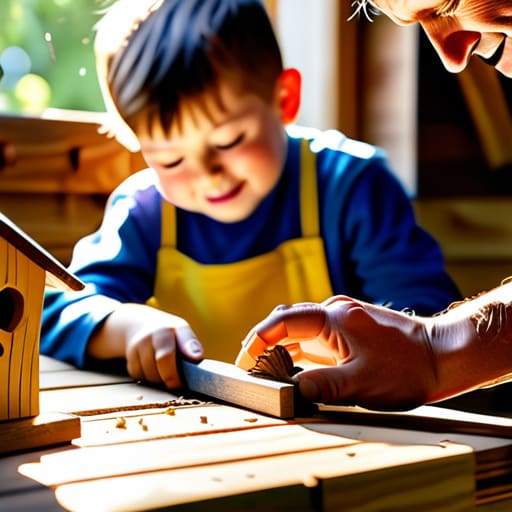
I spent most of my childhood watching my older siblings scramble to fix things with nothing but duct tape and sheer willpower, so I learned early on that you don’t need a massive workshop to be capable. I remember my first attempt at a DIY project—a shaky, lopsided wooden box that looked more like a pile of kindling than a home for anything living. I felt like a total fraud because the tutorials online made it look like you needed a degree in carpentry just to figure out how to build a birdhouse. But here’s the thing: you don’t need expensive power tools or a master’s degree to create something functional and sturdy.
In this guide, I’m stripping away the fluff and the gatekeeping. I’ll show you the exact, no-nonsense steps to get this done using basic materials and a few simple tools you probably already have in a junk drawer. We aren’t aiming for a museum-quality masterpiece; we are aiming for a solid, reliable structure that actually works for the birds. By the time we’re done, you’ll have a finished project and the genuine confidence to tackle whatever else breaks around your apartment. Let’s just get to work.
Table of Contents
Guide Overview
Tools & Supplies
- Handsaw or miter saw to cut wood pieces
- Hammer to drive nails
- Drill with small bit to create entrance hole
- Measuring tape to ensure accuracy
- Sandpaper to smooth rough edges
- Untreated cedar or pine board (1" x 6" x 4')
- Galvanized nails (small box)
- Exterior wood glue (waterproof)
Step-by-Step Instructions
- 1. First, you need to grab your materials. Don’t go out and buy expensive cedar or anything fancy; a basic piece of untreated pine from a hardware store works perfectly fine. You’ll need a handful of nails, a hammer, a saw, and a drill. I always keep a small notebook handy to jot down my measurements before I make the first cut, so don’t just wing it.
- 2. Measure and mark your wood. You’re looking for six specific pieces: a floor, a roof, a back, a front, and two sides. Use a pencil to draw out your lines clearly. I like to leave a little extra room on the roof piece so it creates an overhang, which helps keep the rain from soaking the entrance.
- 3. Time to start cutting. If you don’t have a power saw, a simple hand saw is totally fine—it just takes a bit more patience. Take your time with the straight edges; if the cuts are a little wonky, it’s not the end of the world, but steady strokes will make the assembly much easier later on.
- 4. Drill your entrance hole. This is the most important part for the birds. Pick a spot on the front panel and drill a hole about 1.5 inches wide. Don’t put the hole too low, or the babies might tumble out, and don’t add a perch—perches actually make it easier for predators to hang on and get to the nest.
- 5. Assemble the base and walls. Start by nailing the sides to the floor, then attach the back panel. I find it’s easiest to hold the pieces steady with one hand while you drive the nails with the other. If you’re worried about splitting the wood, drill tiny pilot holes first to give the nails a clear path.
- 6. Attach the front and the roof. Nail the front panel into place, then cap it all off with your roof piece. Make sure the roof is angled slightly so water runs off. If you want to be able to clean the birdhouse out next season, consider using a couple of screws for the roof instead of nails so you can easily remove it later.
- 7. Find a spot and hang it. Don’t just slap it on a fence post. Find a quiet, shaded spot about five to ten feet off the ground. Make sure it’s securely fastened so it doesn’t wobble in the wind. Now, just sit back, grab a coffee, and wait for your new neighbors to move in.
Picking the Best Wood for Outdoor Birdhouses
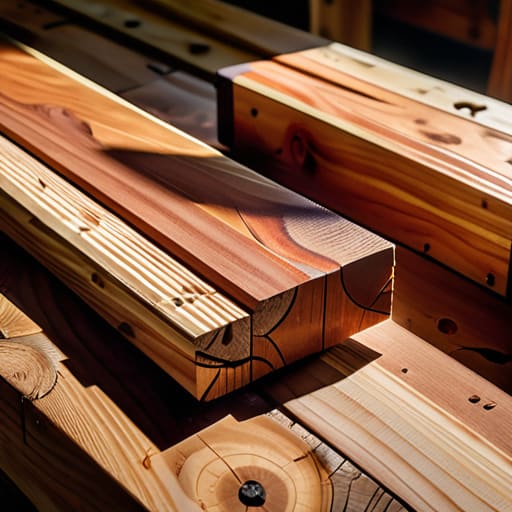
When you’re standing in the lumber aisle, it’s easy to get overwhelmed by the sheer amount of options. My first piece of advice? Skip the fancy hardwoods or anything treated with heavy chemicals. You want something that can handle the elements without rotting away in a single season. For me, the best wood for outdoor birdhouses is almost always cedar or redwood. These woods have natural oils that act as a built-in defense system, making them incredible at protecting birdhouses from weather without you needing to slather them in toxic stains or paints.
If you’re on a tighter budget—which, let’s be real, most of us are—pine is a decent runner-up. It’s cheap and easy to work with, but you’ll need to be more proactive about sealing it to prevent it from warping. Just a heads-up: whatever you choose, avoid plywood if you can. The glue layers tend to delaminate when they get soaked, and that’s a headache you don’t need. Stick to solid, untreated boards to keep the birds safe and your project lasting longer than a single summer.
Essential Woodworking Tools for Birdhouses You Actually Need
Look, you don’t need a workshop full of expensive machinery to get this done. I’ve spent plenty of weekends scavenging through thrift stores for tools, and I’ve learned that the best kit is usually the simplest one. For this project, you really only need the basics: a handsaw, a hammer, some galvanized nails, and a drill. If you’re worried about the precision, don’t be. While some people obsess over professional-grade woodworking tools for birdhouses, a steady hand and a decent measuring tape will get you 90% of the way there.
One thing I can’t stress enough is the importance of your drill bits. If you’re aiming for specific species, like bluebirds, you need to be intentional about your drill bit size to ensure a safe birdhouse entrance hole size. If the hole is too big, predators get in; too small, and the birds can’t use it. Also, grab a bit of sandpaper. Smoothing out the edges around that entrance isn’t just about aesthetics; it’s about making sure the birds don’t snag their feathers when they’re coming and going.
Pro Tips to Keep Your Birdhouse From Becoming a Project Failure
- Skip the paint on the inside. I know it looks cleaner, but the chemicals can be nasty for the birds, and they need a bit of texture on the interior walls to help the fledglings climb out when they’re ready to fly.
- Don’t go overboard with the decorations. A birdhouse is a home, not a Pinterest board. If you add too many perches or flashy ornaments, you’re actually just making it easier for predators to hang on and reach the nest.
- Drill some drainage holes in the bottom. It sounds small, but if rain gets in and can’t get out, you’re basically building a swamp, and no bird is going to move into a damp, moldy box.
- Make sure you have an easy way to clean it out. I usually design one side with a simple hinge or a couple of screws that are easy to remove. You’ll need to clear out the old nesting material every season to keep it sanitary.
- Location is everything. Don’t just nail it to the first tree you see. Think about where the wind comes from and where the sun hits. You want it tucked away enough to feel safe, but not so deep in the shade that it stays freezing all day.
The Bottom Line
Don’t get paralyzed by the gear; you don’t need a professional workshop to do this right, just the basics and a willingness to make a few mistakes.
Focus on durability over aesthetics by picking the right wood, because a birdhouse that rots in one season is just wasted time and money.
Keep it simple and functional—the birds don’t care if your craftsmanship is perfect, they just need a safe, dry place to nest.
The Real Goal
“Building a birdhouse isn’t about mastering fine carpentry or owning a workshop full of expensive gear; it’s about the quiet satisfaction of making something functional with your own two hands and realizing you’re more capable than you gave yourself credit for.”
Owen Silas Vance
Getting It Done
At the end of the day, building a birdhouse isn’t about having a workshop full of expensive, high-end machinery or perfectly matching lumber. It’s about having the right basics—the right wood that can actually handle the weather, a few reliable tools, and the patience to follow the steps without rushing the finish. I know it can feel a bit overwhelming when you’re staring at a pile of raw materials, but once you’ve nailed that first joint and secured the roof, you realize it was never as complicated as the internet made it out to be. Just remember to keep your measurements honest and don’t sweat the small imperfections; they just give the piece character.
Once this is hanging in your yard or on your balcony, you’re going to realize something important: you didn’t just build a birdhouse, you built a new skill. That’s the real win here. We spend so much time feeling like we aren’t “handy” enough to tackle these kinds of projects, but competence is something you earn by actually showing up and getting your hands dirty. So, take pride in what you’ve made, hang it up, and stop waiting for the perfect moment to start your next project. You’ve already proven you can do this. Now, go see who moves in.
Frequently Asked Questions
How do I make sure the birdhouse is actually safe for the birds and not a death trap?
Look, the last thing I want is to build something that actually harms the birds. First, skip the treated lumber—the chemicals are toxic. Stick to natural cedar or pine. Second, ditch the perches; they just give predators a place to hang on. Most importantly, drill a few small ventilation holes near the top and drainage holes in the floor. If it’s stuffy or damp inside, it’s a no-go. Keep it simple, clean, and safe.
Do I really need to paint or stain it, or can I just leave the raw wood out in the rain?
Look, you can leave it raw, but if you do, that birdhouse is going to look like a soggy sponge within a few months. If you want it to actually last more than one season, you need some protection. I usually go with a clear, non-toxic outdoor sealer. Avoid heavy paints or stains that might off-gas chemicals near the birds. Just keep it simple: protect the wood so you aren’t rebuilding this every spring.
Where’s the best spot to actually hang this thing so birds will use it?
Don’t just nail it to the first tree you see. You want a spot that’s quiet but accessible. Aim for about five to ten feet off the ground to keep it safe from predators like cats. Try to find a location that’s partially shaded—you don’t want to turn the birdhouse into a little sauna in the summer heat. Most importantly, face the entrance away from prevailing winds so the babies don’t get chilled.