I used to think that mastering how to freeze food meant buying a set of matching, vacuum-sealed glass canisters that cost more than my weekly grocery budget. I was wrong. Growing up in a cramped apartment with my siblings, we didn’t have the luxury of “aesthetic” organization; we had a tiny, frost-bitten freezer and a constant battle against food waste. I spent way too many nights scraping freezer burn off expensive proteins, feeling like I was just throwing money directly into the trash. It’s frustrating how much “expert” advice makes this process feel like a high-stakes science experiment when it really shouldn’t be that complicated.
I’m not here to sell you on expensive gadgets or complex preservation systems that take up half your counter space. Instead, I’m going to show you the practical, low-cost methods I use to keep my meals fresh without breaking the bank. We’re going to cover the actual mechanics of how to freeze food so that it stays edible, tastes good, and—most importantly—saves you money in the long run. No gatekeeping, no fluff, just the steps you need to get it done.
Table of Contents
Flash Freezing Techniques to Keep Everything Fresh
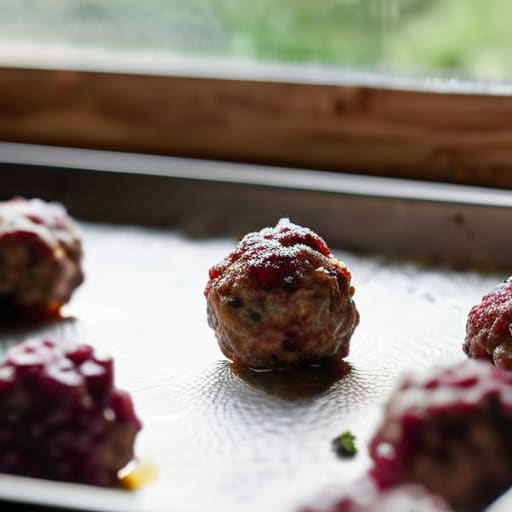
If you just toss a pile of berries or a tray of homemade meatballs straight into a bag, you’re going to end up with one giant, inseparable frozen brick. That’s a waste of time and money. To avoid that, you need to use flash freezing techniques. Spread your items out on a parchment-lined baking sheet so they aren’t touching, and pop them in the freezer for a couple of hours. Once they’re individually frozen solid, you can transfer them to a larger bag or container. This keeps them loose and easy to grab exactly what you need for a quick meal.
Once they’re hard, transfer them into freezer safe containers or heavy-duty silicone bags. If you really want to go pro and maximize your shelf life, I’d recommend vacuum sealing for preservation. It pulls out the air that causes that nasty, icy texture we all hate. Regardless of the method, don’t skip the most important step: write the date and what’s inside on the package. It’s a small habit, but it’s one of the best ways to manage your kitchen without the constant guesswork.
Choosing Freezer Safe Containers That Actually Work
Look, I’ve learned the hard way that not every plastic tub in your kitchen cabinet is built for the deep freeze. I used to grab whatever was lying around, only to open my freezer a month later and find a block of ice that had completely ruined my leftovers. If you want to avoid that, you need to invest in actual freezer safe containers. Glass containers with snap-on lids are great for leftovers you plan to reheat, but for long-term storage, look for BPA-free plastics that are specifically rated for low temperatures. They won’t get brittle and crack when the temperature drops.
If you’re serious about preventing freezer burn, you also need to consider the air gap. Air is the enemy here. If there’s too much empty space in a large container, your food is going to dry out and get those weird, icy textures. I personally swear by heavy-duty freezer bags for smaller portions; just squeeze every last bit of air out before you zip them shut. Once they’re packed, don’t forget the most important step: properly labeling frozen meals with a permanent marker and a date. It sounds tedious, but it’s the only way to know exactly how long food lasts in the freezer before it’s time to toss it.
Five Ways to Stop Your Freezer from Becoming a Food Graveyard
- Label everything with a sharpie and a piece of masking tape. I know it feels extra, but three weeks from now, you aren’t going to remember if that bag contains homemade pesto or just green sludge. Write the date and the contents clearly so you aren’t playing guessing games every time you’re hungry.
- Portion your meals out before they hit the ice. Don’t freeze a massive, three-pound block of beef stew that you’ll have to thaw all at once; use smaller, single-serving bags or containers so you can grab exactly what you need for one meal without wasting the rest.
- Squeeze the air out of your bags like you mean it. Air is the enemy here—it’s what causes that weird freezer burn that makes everything taste like cardboard. If you’re using zip-top bags, flatten them out on the counter to push every last bit of air toward the seal before you close it.
- Don’t overstuff the shelves. It sounds counterintuitive when you’re trying to be organized, but your freezer needs air circulation to keep the temperature consistent. If you pack it too tight, you’ll end up with warm spots that compromise the quality of your food.
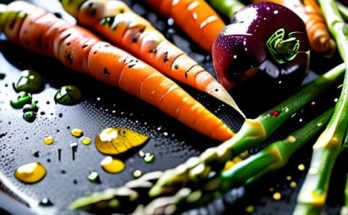
- Blanch your veggies first. If you’re tossing in broccoli, carrots, or greens, give them a quick boil and then an ice bath before freezing. It stops the enzymes that cause decay, meaning they’ll actually taste like vegetables instead of mushy, gray leftovers when you finally cook them.
The Bottom Line on Freezing Smart
Don’t just toss things in a bag and hope for the best; use flash freezing for small items like berries or herbs so they don’t turn into one giant, unusable ice brick.
Invest in decent, airtight containers because cheap plastic cracks or lets air in, and air is exactly what causes that gross freezer burn we’re all trying to avoid.
Treat your freezer like a system, not a black hole—label everything with a date so you actually use what you have instead of letting money rot at the bottom of the drawer.
The Real Cost of a Full Trash Can
“Freezing food isn’t about being a gourmet chef or having a perfectly organized kitchen; it’s about looking at a bag of wilting spinach or a leftover portion of pasta and seeing a future meal instead of a wasted twenty bucks.”
Owen Silas Vance
The Bottom Line
Look, I know it feels like a chore to stop what you’re doing and prep containers, but it pays off. Between mastering flash freezing to prevent those annoying ice crystals and actually investing in proper, airtight containers that won’t crack, you’re doing more than just storing food. You’re essentially building a little safety net in your freezer. When you use these methods, you aren’t just saving a few wilted vegetables; you are protecting your grocery budget and ensuring that “what’s for dinner” never becomes a stressful, expensive last-minute decision.
At the end of the day, food prep isn’t about being a perfect chef or having a Pinterest-worthy kitchen. It’s about the small, practical wins that make your life run a little smoother. Every time you freeze a portion of leftovers or a bag of berries instead of tossing them, you’re practicing a form of intentional living. You don’t need a massive meal-prep setup to make this work; you just need to start where you are. Grab a bag, find a container, and just start doing it. Your future, hungry, and slightly less stressed self will definitely thank you.
Frequently Asked Questions
How do I know if something is actually safe to eat after it's been sitting in the freezer for a few months?
Honestly, the “sniff test” doesn’t work in the freezer because everything’s frozen solid. Instead, look for freezer burn—those nasty icy patches or grayish, dried-out spots on meat. If it looks like it’s been through a war, it’s probably safe but will taste like cardboard. For everything else, stick to the “six-month rule” for most basics. If you can’t remember when you put it in there, just toss it. Better to lose five bucks than get sick.
Can I freeze leftovers that have already been sitting in the fridge for a day or two, or is that asking for trouble?
Look, I get the temptation to save a meal when you’re busy, but here’s the rule of thumb: if it’s been in there for a day or two, you’re usually fine, but don’t push it. If it’s been sitting for more than three days, just let it go. It’s not worth the risk of food poisoning or a freezer that tastes like old fridge air. If it smells off or looks weird, toss it.
Is it better to freeze things in large batches to save time, or should I stick to individual portions for easier use later?
Look, if you’re trying to save time on a Sunday, large batches feel like the move. But honestly? Go with individual portions. I’ve learned the hard way that defrosting a massive tub of chili just to eat one bowl is a recipe for wasted food and a messy kitchen. Portioning things out into smaller, single-serve containers—or even freezer bags—means you only thaw exactly what you need. It’s a little more prep upfront, but it’s way more efficient long-term.