I was sitting on my floor last Tuesday, surrounded by a mountain of half-empty cardboard boxes and a stack of paperbacks that had no home, realizing I was about to spend eighty bucks on a particle-board unit from a big-box store that would fall apart in six months. I looked at my multi-tool, then at the scrap wood in the corner, and decided I was done with “disposable” furniture. Most people think you need a professional workshop or a massive budget to master how to build a bookshelf, but that’s just gatekeeping. You don’t need a master carpenter’s license; you just need a plan that actually works and the guts to make your first few cuts.
In this guide, I’m stripping away the fluff and the overly complicated blueprints that make DIY feel impossible. I’m going to show you how to measure once, cut twice, and assemble a piece that actually holds weight without breaking your bank account. We’re focusing on the essential tools, the right wood choices, and the specific steps to ensure your shelves don’t sag after a week. Let’s stop staring at the mess and just start building.
Table of Contents
Guide Overview
Tools & Supplies
- Circular saw or hand saw for cutting wood to size
- Power drill for driving screws
- Measuring tape for precise dimensions
- Sandpaper for smoothing surfaces
- Level to ensure stability
- 1×4 or 1×6 lumber (approx. 4-5 boards)
- Wood screws (1.5 inch)
- Wood glue for reinforced joints
- Wood stain or paint for finish
Step-by-Step Instructions
- 1. First things first, you need to get your materials together. Don’t go overboard with the fancy hardwoods; a few sheets of high-quality plywood or even some sturdy pine boards from the local hardware store will do the trick. You’ll also need wood glue, some finish nails, a drill, a level, and a saw. I always say, measure twice and cut once, so grab a tape measure and a pencil before you even think about touching the saw.
- 2. Start by cutting your side panels. These are going to be the vertical backbone of your shelf, so make sure they are exactly the same length. If one is even a fraction off, your whole project is going to feel wonky and unstable when you try to stand it up. Clear a flat space on the floor—ideally a rug or some cardboard—so you don’t scratch your new wood or your floor.
- 3. Now, it’s time to mark out where your shelves are actually going to sit. Use your level to draw straight, horizontal lines across your side panels. This is where most people mess up; they just eyeball it, but if those lines aren’t straight, your books are going to slide right off. Trust the tool, not your eyes, when you’re marking these spots.
- 4. Let’s get some glue and nails involved. Apply a thin, even bead of wood glue along the edges of your shelf boards, then position them against the marks you made on the side panels. I like to use a few small clamps to hold everything in place while I work. This keeps the structure from shifting and ensures the joints are tight and secure before you commit to the final nails.
- 5. Once everything is clamped and aligned, start driving your finish nails through the side panels into the edges of the shelves. Don’t go too fast; if you hammer too hard, you might split the wood or cause the whole thing to warp. If you’re using a drill, pre-drill tiny pilot holes first—it’s a small extra step that saves you a massive headache later.
- 6. Check the whole thing for stability. Give it a gentle shake to make sure nothing feels loose. If it wobbles, you might need to add a thin piece of plywood to the back (a “backing board”) to square everything up. This is the secret to making a cheap DIY project feel like a solid piece of furniture rather than a flimsy cardboard box.
- 7. Finally, sand it down. Grab some medium-grit sandpaper and smooth out any rough edges or bumps where the boards meet. You don’t need a professional finish; just get it smooth enough that it feels good to the touch. If you’re feeling ambitious, slap on a bit of stain or a simple matte sealant, but honestly, even a clean, natural wood look works perfectly for a minimalist setup.
Mastering the Essentials Woodworking Tools for Beginners
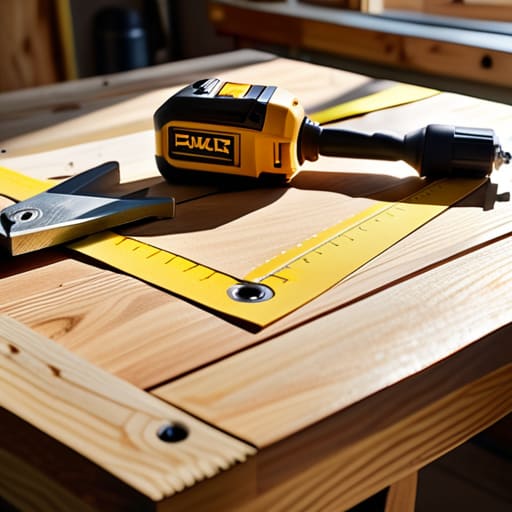
Look, I get it. Walking into a hardware store can feel like stepping into a labyrinth designed to make you feel incompetent. You don’t need a workshop full of industrial machinery to get this done, but you do need the right woodworking tools for beginners to avoid a massive headache halfway through. My advice? Start with the basics: a reliable tape measure, a speed square, and a decent cordless drill. If you try to wing it with a dull handsaw or a cheap ruler, you’re going to end up with a wobbly mess that looks more like a science project than furniture.
Precision is where most people trip up. When you’re measuring and cutting lumber, the old adage “measure twice, cut once” isn’t just a cliché—it’s a survival tactic for your wallet. I’ve definitely learned that lesson the hard way by accidentally shortening a shelf by a quarter inch. Also, don’t overlook the importance of properly sanding and finishing wood surfaces. It’s the difference between a piece that feels like a cheap DIY project and one that actually feels like it belongs in your home. Take your time with the prep; it makes the actual build much smoother.
Precision Over Panic Measuring and Cutting Lumber
Look, I’ve been there—standing in the middle of a hardware store aisle, staring at a pile of pine boards, feeling like I’m about to ruin everything. The biggest mistake I see is rushing the math. Before you even touch a saw, grab your pencil and double-check your numbers. When you’re measuring and cutting lumber, remember that the width of your saw blade (the kerf) actually eats up a tiny bit of wood. If you don’t account for that, your final pieces are going to be slightly too short, and nothing kills your momentum faster than a crooked frame.
Once you’ve got your measurements dialed in, take a breath. If you’re using a hand saw, it’s all about steady, controlled strokes; if you’ve upgraded to a power saw, let the tool do the heavy lifting rather than forcing it through the grain. I always mark my “cut line” with an ‘X’ on the waste side of the line so I don’t accidentally shave off the part I actually need. It sounds tedious, but precision now saves you from a massive headache when it’s time to assemble.
Pro-Tips to Keep Your Project from Becoming a Disaster
- Don’t skip the sanding. It’s tempting to move straight to the finish, but a quick pass with some medium-grit sandpaper now saves you from a lifetime of splinters and a messy-looking shelf later.
- Check your level—twice. I’ve seen too many people rush the assembly only to realize their “sturdy” shelf is leaning like the Tower of Pisa because they didn’t verify the base was flat.
- Pilot holes are your best friend. If you try to drive a screw directly into wood without drilling a small hole first, you’re almost guaranteed to split the grain, and once that happens, there’s no going back.
- Build for your actual books, not your “ideal” books. Measure your tallest hardcovers before you set your shelf spacing; there is nothing more frustrating than building a beautiful unit that can’t actually hold your collection.
- Use a little bit of wood glue on your joints. Screws provide the mechanical strength, but a tiny bit of glue makes the whole structure feel much more solid and prevents that annoying wobbling over time.
The Bottom Line: Don't Sweat the Small Stuff
Perfection is the enemy of progress; if your cuts are off by a hair, adjust your plan instead of scrapping the whole project.
Invest in the tools you actually need, not the ones that look cool in a professional workshop video.
Slow down and measure twice—it’s much easier to fix a measurement error on paper than it is to fix it once the saw has already hit the wood.
The Real Goal
“A bookshelf isn’t just a place to dump your books; it’s the first piece of proof that you can take a raw material, follow a plan, and actually build something that holds weight in your life.”
Owen Silas Vance
Finishing Strong
At this point, you’ve done the heavy lifting. You’ve navigated the intimidation of the lumber yard, mastered the precision of your cuts, and survived the inevitable moment where a screw went in a little crooked. Remember, the goal wasn’t to create a museum-grade piece of art; it was to build something functional that didn’t cost a month’s rent. By focusing on steady progress rather than instant perfection, you’ve successfully turned a pile of raw wood into a tool for your home. Take a second to wipe down the sawdust, tighten those last few joints, and appreciate the fact that you actually built this with your own two hands.
If you’re looking at your new bookshelf and noticing a scratch or a slightly uneven shelf, don’t sweat it. That’s not a failure; that’s character. My DIY furniture always has a story, and usually, that story involves a little bit of trial and error. The real win here isn’t just the extra storage space in your apartment—it’s the realization that you don’t need to wait for someone else to come fix your life or furnish your space. You have the tools, you have the steps, and now you have the momentum. So, grab your notebook, mark this project as complete, and start thinking about what you’re going to build next.
Frequently Asked Questions
How do I make sure the whole thing doesn't wobble or lean to one side once it's standing up?
That wobble is the universal sign of a project going sideways, but don’t sweat it—it’s usually just a geometry issue. The secret is the back panel. Even a thin piece of plywood acts like a brace that locks everything into a perfect rectangle. If you’re skipping the back, you need to add corner braces or a cross-brace. Just check your squareness as you go; if it’s leaning, it’s not square.
What’s the best way to finish the wood so it looks decent without spending a fortune on fancy stains?
Look, you don’t need a $50 boutique stain to make this look good. Honestly, skip the fancy stuff. Grab a decent quality wipe-on poly or even just a simple oil-based finish. It’s way more forgiving if you mess up a spot, and it gives you that clean, natural look without looking like a DIY disaster. Just sand it down smooth first—that’s where the real magic happens. Keep it simple, keep it cheap.
Is there a way to anchor this to the wall so it doesn't tip over if I overload the shelves?
Absolutely. Honestly, this is the part most people skip, and it’s exactly how accidents happen. You don’t want your hard work toppling over just because you decided to load it up with heavy textbooks. Grab some L-brackets and some wall anchors—even if you aren’t in a rental, it’s non-negotiable. Just screw the brackets into the top of the shelf and then into a stud or an anchor in the wall. Secure it, and you’re good to go.