I was staring at the fraying seam of my favorite Levi’s last Tuesday, feeling that familiar sting of defeat because I couldn’t justify spending forty bucks to replace them. Most people will tell you that once the denim starts thinning or a hole pops in the pocket, it’s time to head to the mall and start your search for a new pair. That is a total lie. Learning how to patch jeans isn’t about making them look brand new again; it’s about extending their lifespan so you aren’t constantly throwing money down the drain.
I’m not going to walk you through some complicated, high-fashion embroidery technique that requires a studio setup. Instead, I’m going to show you the practical, low-cost ways to fix holes using stuff you probably already have in a junk drawer or an old shirt. We’re going to cover everything from basic reinforcement to more visible, intentional repairs. My goal is to give you the confidence to grab a needle and some thread and just get it done without overthinking the aesthetic.
Table of Contents
- Step-by-Step Instructions
- Mastering Visible Mending Techniques Without the Overcomplication
- Choosing the Right Denim Patch Fabric Types for Longevity
- Pro-Tips for a Patch That Actually Lasts
- The Bottom Line on Keeping Your Denim Alive
- On the Value of a Good Repair
- The Final Stitch
- Frequently Asked Questions
Guide Overview
Tools & Supplies
- Fabric scissors for cutting patch shapes
- Sewing needle for hand stitching
- Thimble to protect fingers
- Denim scrap or fabric patch (1 piece)
- Embroidery floss or heavy-duty thread (1 spool)
Step-by-Step Instructions
- 1. First, you need to grab your supplies. I always keep a small sewing kit in my desk, but for this, you’ll need a needle, some heavy-duty thread (denim thread is best if you can find it), and your patch material. If you’re going for a subtle look, find some scrap fabric from an old pair of jeans or a sturdy cotton. If you want to lean into the “repaired” aesthetic, go for something with a pattern.
- 2. Clean up the edges of the hole. Don’t just slap a patch over frayed threads; it’ll look messy and won’t hold. Use a pair of small scissors to trim away the loose, dangling bits of denim around the tear. You want a relatively clean perimeter so the patch has a flat surface to sit on.
- 3. Position your patch. Lay the fabric over the hole, but don’t just center it perfectly like a math problem. If you want it to look intentional, offset it slightly. Pin it in place with sewing pins so it doesn’t shift while you’re working—there’s nothing more frustrating than chasing a moving target halfway through a stitch.
- 4. Start your first stitch. Thread your needle and tie a decent knot at the end. Start sewing about a quarter-inch away from the edge of the hole to anchor the patch to the “healthy” part of the jeans. Use a simple running stitch or, if you want it to be extra durable, try a backstitch. It takes a little longer, but it’s much stronger for high-stress areas like the knees.
- 5. Work your way around the perimeter. Keep your tension even—not so tight that the denim puckers and looks like a raisin, but not so loose that the patch feels floppy. I find that focusing on consistent spacing between my stitches makes the whole thing look professional rather than a frantic DIY job.
- 6. Reinforce the center if needed. If the hole was particularly large or the denim is thinning around the edges, don’t be afraid to do a second pass. I usually go over the edges one more time to make sure there are no gaps where the original tear could peek through.
- 7. Tie it off and trim. Once you’ve circled the entire area, bring your needle to the underside of the fabric, loop it through the thread, and pull tight to create a knot. Do this twice just to be safe. Snip the excess thread, and you’re done. Now, instead of a ruined pair of pants, you’ve got a customized piece of gear that’s actually better than it was before.
Mastering Visible Mending Techniques Without the Overcomplication
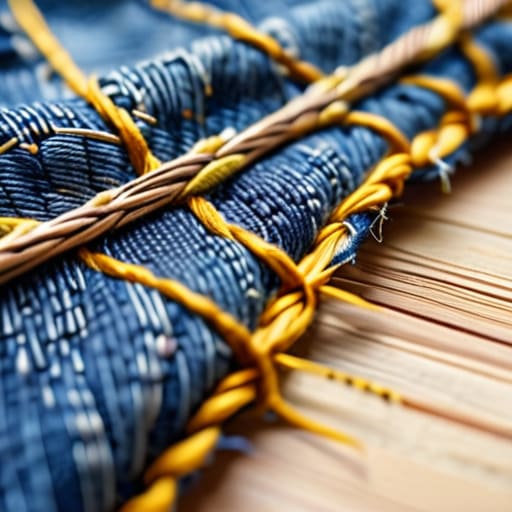
If you’re feeling a little intimidated by the idea of sewing, don’t sweat it. You don’t need to be a master tailor to make a repair look intentional. One of my favorite ways to handle a blowout is through visible mending techniques, where you actually lean into the repair rather than trying to hide it. Instead of fighting the hole, you can use contrasting thread colors or even some simple embroidery for clothing repair to turn a mistake into a design choice. It’s much more satisfying than trying to make a patch disappear, and it honestly gives your gear more character.
When you’re picking out materials, keep an eye on your denim patch fabric types. I usually go for something slightly heavier than the original fabric so the patch actually has some structural integrity. If you aren’t ready to pick up a needle just yet, you can always experiment with how to use iron-on patches as a base layer to stabilize the area before you start stitching. It’s all about building a foundation that lasts, so you aren’t back here fixing the same spot in two weeks.
Choosing the Right Denim Patch Fabric Types for Longevity
When you’re picking out fabric for a repair, don’t just grab the first scrap of cotton you find in a junk drawer. If you want this fix to actually last, you need to match the weight of your patch to the weight of your jeans. I usually look for a heavy-duty cotton twill or even a piece of old denim from a pair that’s already seen its last day. If the patch is too thin, it’ll just get swallowed by the structural tension of the pants; if it’s too thick, you’ll end up with a bulky, uncomfortable lump that feels like you’re wearing a piece of cardboard.
If you aren’t feeling particularly crafty, you can always look into how to use iron-on patches as a base layer. I like to use an iron-on stabilizer underneath my fabric before I start sewing. It gives you a solid foundation so the material doesn’t bunch up while you’re working. Whether you’re leaning into darning denim holes for a subtle look or going full-on artistic, the secret to longevity is always about the strength of the material you choose to layer in.
Pro-Tips for a Patch That Actually Lasts
- Don’t skip the ironing. If you’re working with a patch, iron it flat against the denim before you even touch a needle. It keeps the fabric from bunching up and makes the whole process way less frustrating.
- Mind the tension. If you pull your thread too tight while sewing, you’re going to puck the denim and create a weird, stiff lump. Keep your stitches steady but relaxed so the fabric can still move naturally.
- Reinforce the edges. Most people focus on the middle of the patch, but the edges are where the real wear happens. Make sure your stitching goes slightly past the perimeter of your patch to anchor it securely to the original jeans.
- Match the weight, not just the color. If you try to patch heavy-duty raw denim with a thin piece of flannel, the patch is going to shred in a week. Aim for fabrics with a similar thickness to the jeans themselves.
- Use the right thread. Skip the cheap, decorative embroidery floss for structural repairs. Grab some heavy-duty polyester or cotton-wrapped polyester thread—it’s built to handle the friction and movement of your legs without snapping.
The Bottom Line on Keeping Your Denim Alive
Don’t sweat the perfection—visible mending is about making something functional again, not winning an embroidery contest.
Always match your patch fabric to the weight of your jeans so the repair doesn’t feel like a stiff, awkward brick on your leg.
Treat mending as a way to save money and build competence; a $5 patch is always better than a $60 replacement.
On the Value of a Good Repair
“A patch isn’t just a fix for a hole; it’s a refusal to let a little wear and tear dictate when something’s done being useful. Whether you hide the stitch or make it part of the design, you’re choosing to keep what you love instead of just replacing it.”
Owen Silas Vance
The Final Stitch
At the end of the day, patching your jeans is about more than just covering a hole; it’s about the materials you choose and the method you apply. Whether you decided to go with a subtle, hidden patch to keep things low-key or leaned into the character of visible mending with some heavy-duty thread, you’ve successfully extended the life of a garment that would otherwise end up in a landfill. Remember that the right fabric choice—whether it’s a sturdy scrap of vintage denim or a piece of canvas—is what ensures your hard work actually lasts through the next dozen washes.
I know that staring at a ripped seam can feel like a chore, or maybe even a sign that you aren’t quite “adulting” correctly, but that’s a lie. Taking ten minutes to grab your needle and thread is a massive win for your wallet and your mindset. Every time you fix something instead of replacing it, you’re building a specific kind of practical competence that most people just ignore. So, don’t sweat the imperfections in your stitching. The goal isn’t to make it look factory-new; it’s to make it yours, and to prove that you have the tools to handle whatever comes your way.
Frequently Asked Questions
How do I stop the patch from puckering or looking all bunched up?
Puckering usually happens because you’re pulling the thread too tight or your tension is off. Think of it like this: you’re trying to secure the fabric, not strangle it. Keep your stitches loose and consistent. If you’re using a machine, try a stabilizer—even a piece of thin cardboard or scrap paper underneath can help. If you’re hand-sewing, just relax your grip. Slow down, breathe, and let the needle do the work.
Can I actually wash these in a machine once they're fixed, or will the patch fall off?
Short answer: Yes, you can. Long answer: As long as you aren’t being reckless with it. If you used a decent needle and consistent stitching, a standard machine cycle won’t just rip it right off. I usually recommend turning them inside out and using a cold, gentle cycle to keep the tension low. It’s better for the denim and much easier on your handiwork. Just avoid the high-heat dryer if you can—air drying is your best friend here.
What do I do if the hole is right on a seam where it's harder to reach?
Seam holes are a pain, but don’t sweat it. When the hole is tucked into a seam, you can’t just slap a patch on top. You’ll need to carefully unpick the loose threads around the damage with your multi-tool or a seam ripper to clear some space. Once it’s flat, use a small patch underneath and stitch it down using a tight zigzag stitch. It’s a bit more tedious, but it keeps the structural integrity intact.