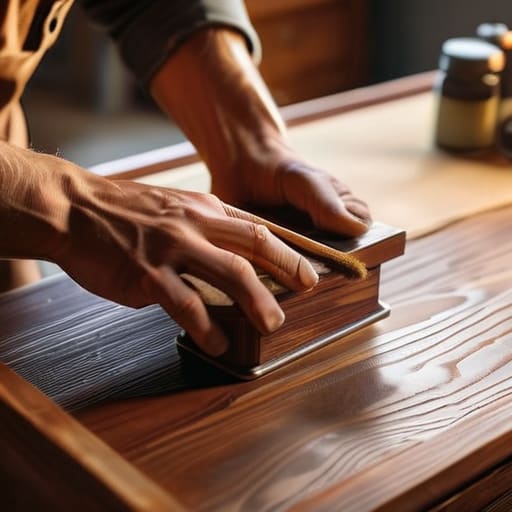
I was staring at a scratched-up, mid-century nightstand I’d pulled from a curb last Tuesday, covered in layers of ugly, peeling beige paint, and felt that familiar wave of doubt. Most people look at a piece like that and see a trip to the landfill, or they think you need a professional workshop and a massive budget to fix it. But here’s the truth: you don’t need a fancy studio to master how to refinish furniture. You just need a little patience, a decent sandpaper grit, and the willingness to get your hands a bit dirty. I learned early on growing up in a cramped apartment that if you can’t afford a new dresser, you make one work.
In this guide, I’m stripping away the intimidating jargon and the expensive, unnecessary tools. I’ll walk you through the actual, messy reality of the process—from the initial sanding to that final, satisfying coat of finish—without the gatekeeping. My goal is to show you that competence is a skill you can build right at your kitchen table. We’re going to focus on practical, repeatable steps that actually work, so you can stop scrolling through Pinterest and start actually doing the work.
Table of Contents
Guide Overview
Tools & Supplies
- Sandpaper (various grits for smoothing)
- Screwdriver (for removing hardware)
- Paintbrush or foam roller (for applying finish)
- Microfiber cloth (for dust removal)
- Wood filler (small container for cracks)
- Sanding block (one for even pressure)
- Primer (one quart for base coat)
- Paint or Stain (one quart for final color)
- Clear topcoat (one quart for protection)
Step-by-Step Instructions
- 1. First things first, you need to clear some space and get your supplies ready. I always keep a dedicated box for my furniture projects so I’m not hunting for sandpaper halfway through a job. You’ll need a multi-tool (mine’s always in my pocket), some varying grits of sandpaper (80, 120, and 220 are the basics), a tack cloth, and whatever finish you’re aiming for. Don’t try to wing it with whatever scraps you find in the junk drawer; having the right tools actually makes the job faster and less frustrating.
- 2. Next, you have to strip it down. If you’re dealing with an old piece that has thick, chunky paint or a heavy varnish, you might want to use a chemical stripper, but for most thrifted finds, sanding is your best friend. Start with the coarse 80-grit sandpaper to knock off the old finish. It’s going to get messy, and you’ll probably feel like you aren’t making progress, but just keep going until you see the raw wood underneath.
- 3. Once the old finish is gone, it’s time to refine the surface. This is where most people rush, but don’t do that. Switch to the 120-grit, and then finally the 220-grit. You want the wood to feel smooth as glass under your hand. If you can feel a scratch or a bump, the finish will eventually highlight it, so take your time here. This is the difference between a piece that looks DIY and one that looks professional.
- 4. Before you even think about opening a can of stain or paint, you have to clean the dust away. I use a vacuum with a brush attachment first, and then I go over everything with a tack cloth. If there is even a tiny bit of sawdust left in the grain, your finish will look gritty and uneven. I treat this step like a ritual of patience; if the surface isn’t spotless, the whole project is compromised.
- 5. Now comes the fun part: applying the color. Whether you’re using a wood stain to enhance the grain or a matte paint for a modern look, apply thin, even layers. I’ve learned the hard way that one thick coat is a recipe for drips and bubbles. It’s much better to do three light coats than to try and finish the job in one heavy, messy go.
- 6. Finally, you need to protect your work with a topcoat. If you’re using a stain, a polyurethane or a wax finish will seal everything in and prevent water rings from ruining your hard work. Apply it slowly, following the direction of the wood grain, and let it dry completely between coats. I know it’s tempting to start using the piece immediately, but letting it cure is the only way to ensure it lasts for years instead of weeks.
Mastering Wood Stripping Techniques Without the Stress
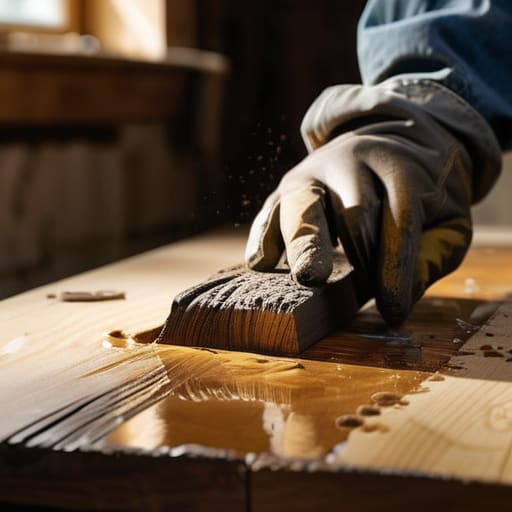
Look, I’ll be real with you: the chemical stuff can feel a bit intimidating if you’ve never used it. When you’re removing old varnish or thick layers of paint, the temptation is to just scrub harder and faster. Don’t do that. You’ll just end up gouging the wood or creating a mess. Instead, think of it like a slow burn. Apply a generous, even layer of stripper, let it do the heavy lifting for the time it specifies, and then use a plastic scraper to lift the sludge. It’s much easier to work with the chemicals than it is to fight the wood.
Once you’ve cleared the gunk, your next priority is wood grain preparation. This is where most people rush and end up with a patchy finish. Use a medium sandpaper to clear out any leftover residue in the pores, then move to a finer grit. If you skip this, your stain is going to soak in unevenly, and you’ll be staring at dark blotches for weeks. Take your time here; a smooth surface is the difference between a piece that looks “DIY” and one that looks like a professional find.
The No Nonsense Furniture Sanding Grits Guide
Look, I’ve seen too many people jump straight into a high-grit sandpaper because they want to finish fast, only to end up with a surface that looks scratched and uneven. Sanding isn’t just about smoothing things out; it’s about wood grain preparation. You need to think of it as a progression. I always start with a coarse grit—usually around 80 or 100—to tackle the heavy lifting after you’ve finished removing old varnish. If you skip this step and try to go straight to fine sanding, you’re just polishing the scratches you made with the coarse paper.
Once the surface is level, move up to a medium grit like 150. This is where the real magic happens. You’re erasing the deep gouges and getting the wood ready for whatever finish you have planned. I always tell myself: never skip a grit level. If you jump from 80 to 220, you’re going to leave behind microscopic valleys that will trap stain and look like dark blotches later. Follow this furniture sanding grits guide religiously, and you’ll save yourself a massive headache when it’s time to start applying your finish.
Pro Tips to Keep You From Losing Your Mind (and Your Deposit)
- Don’t skip the lighting check. I’ve learned the hard way that a piece can look flawless under a bright kitchen light but show every single scratch once it’s in your living room. Use a side-angle lamp to catch the imperfections before you commit to the finish.
- Test your stain on a scrap piece first. Never, and I mean never, go straight for the main surface. Find an old piece of wood or even a hidden underside to see how the color actually reacts with the grain. It’s better to spend ten minutes testing than ten hours regretting.
- Work in small, manageable sections. If you try to coat a whole tabletop at once, you’re going to end up with lap marks and uneven drying. Think of it like painting a room—do a small area, get it smooth, and move on. It keeps the process from feeling overwhelming.
- Keep a “junk drawer” of supplies ready. There is nothing more frustrating than being halfway through a coat and realizing you’re out of clean rags or your sandpaper is clogged. Keep a small bin with fresh microfibers, extra tack cloths, and a few extra grits within arm’s reach.
- Embrace the “good enough” mindset for your first few tries. I used to obsess over every microscopic swirl mark, but honestly? Most people won’t notice them, and they won’t stop the piece from looking great. Focus on the big picture and don’t let perfectionism stall your progress.
The Bottom Line
Don’t rush the prep work; the difference between a piece that looks professional and one that looks amateur is almost always in the sanding and the stripping.
You don’t need a garage full of expensive tools to get results, just the right grits and a bit of patience to see the process through.
Mistakes are part of the learning curve, so if a finish looks wonky, just sand it back down and try again—competence is built through trial and error.
The Real Value of the Work
“Refinishing isn’t about chasing some perfect, showroom aesthetic; it’s about the satisfaction of looking at something broken or neglected and knowing you had the patience to bring it back to life yourself.”
Owen Silas Vance
The Finish Line
Look, I know it feels like a lot when you’re staring at a pile of sandpaper, a half-empty can of stripper, and a piece of furniture that looks like it’s seen better decades. But we’ve covered the ground: you’ve mastered the stripping process, you’ve navigated the grit progression, and you’ve done the heavy lifting of the prep work. The most important thing to remember is that consistency beats perfection every single time. If you missed a tiny spot of old finish or your sanding isn’t quite factory-smooth, don’t sweat it. You’re building the muscle memory of a maker, and that’s worth more than a flawless surface on your first try.
At the end of the day, this isn’t just about making a thrifted side table look expensive; it’s about the fact that you actually did the thing. There is a specific kind of quiet confidence that comes from looking at an object in your home and knowing you’re the one who gave it a second life. You didn’t wait for a professional or a massive budget to change your space—you just picked up the tools and got to work. So, wipe down that wood, apply your first coat, and enjoy the result. You’ve earned it.
Frequently Asked Questions
Is it actually worth it to refinish old furniture, or am I just spending more on supplies than the piece is worth?
Look, if you’re trying to flip a $10 thrift store find for a massive profit, the math might not work once you factor in sandpaper and stripper. But if you’re asking if it’s worth it for your home? Absolutely. You’re getting a solid, mid-century piece for the price of a cheap particle-board desk, plus the satisfaction of knowing you actually built the skill. Don’t chase margins; chase quality you can actually live with.
How do I know if a piece is made of real wood or if it's just a cheap veneer that's going to peel off?
Before you drop money on a fixer-upper, you’ve gotta check the bones. Run your hand along the edges—if you feel a distinct seam or a thin layer that looks like a sticker, it’s likely a veneer. I also look at the grain; if the pattern repeats perfectly every few inches, it’s probably a printed laminate. Pro tip: check the underside or the back. Real solid wood will have inconsistent, organic patterns all around.
What’s the best way to deal with the smell and fumes if I’m working in a small apartment?
Look, I’ve been there. When you’re working in a small rental, those fumes aren’t just annoying—they’re overwhelming. First, ditch the heavy solvents; opt for citrus-based strippers or water-based finishes whenever possible. They smell way less aggressive. Second, cross-ventilate like it’s your job. Open the windows and set up a box fan facing outward to pull the air through. Finally, grab a decent respirator. Don’t skip this just to save space; your lungs are worth more than a side table.