I remember moving into my first real apartment and realizing my bed looked like a lonely island in the middle of a sea of beige walls. It felt unfinished, but when I looked at the price tags for “designer” bedroom sets, I realized I’d have to choose between eating well or having a decent place to sleep. Most people think you need a massive budget to make a bedroom feel intentional, but that’s just gatekeeping. Finding the right diy headboard ideas isn’t about buying something expensive; it’s about realizing that a little bit of sweat equity can completely transform the energy of your entire space without draining your savings.
I’ve spent way too many weekends scouring thrift stores and messing around with scrap wood to figure this out, so I’m doing the heavy lifting for you. In this post, I’m breaking down five specific ways you can build a custom headboard that actually looks high-end. Whether you’re working with a tiny studio or have a bit more room to play, these projects are designed to be simple, practical, and achievable even if you don’t own a single power tool yet. Let’s stop settling for a blank wall and actually start building a room you love.
Table of Contents
The Scavenged Wood Slat Wall
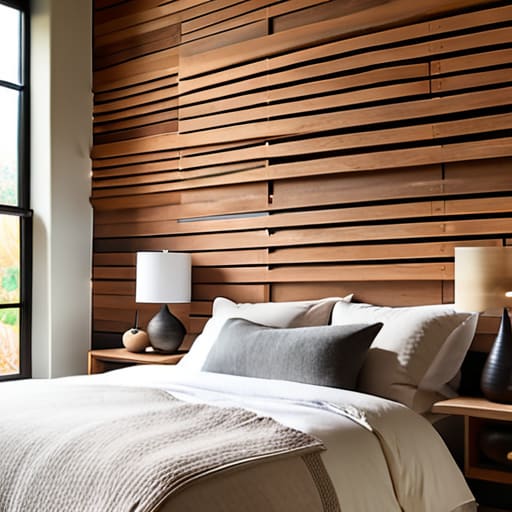
If you’ve ever spent a Saturday wandering through a construction site or a local salvage yard, you know that some of the best materials are just waiting to be reclaimed. I’m a big fan of using reclaimed wood slats to create a floor-to-ceiling headboard effect. It gives your room that intentional, architectural look without the massive price tag of a designer piece. You just need a few long pieces of timber, some wood glue, and a way to mount them to the wall.
The Upholstered Panel Hack
Most people think you need a professional upholsterer to get those high-end, tufted headboards you see on Instagram. Honestly? That’s just gatekeeping. You can DIY a killer upholstered panel using a piece of plywood, some high-density foam, and whatever fabric catches your eye at a thrift store. I usually go for something with a heavy texture, like linen or a durable cotton weave, to keep it looking sophisticated rather than cheap.
The Low-Maintenance Macramé Hang
For the days when you don’t actually want to pick up a power drill, a textile hanging is your best friend. I’ve seen people spend hundreds on woven wall hangings, but you can achieve a similar vibe by finding a sturdy, interesting branch outside and weaving some thick cotton cord through it. It’s a minimalist approach that works perfectly if you’re living in a rental and can’t be making permanent changes to the walls.
The Floating Shelf Method
Sometimes, a traditional headboard is just too much clutter for a small room. If you’re working with a tight floor plan—something I dealt with constantly growing up—a long, narrow floating shelf is a much smarter move. It acts as a headboard visually, but it also gives you a dedicated spot to set your phone, a glass of water, or a book so you aren’t constantly fumbling on a nightstand.
The Painted Geometric Statement
If you have absolutely zero budget and even less storage space for tools, just grab a can of paint. You don’t actually need a physical object to define the headboard area; you can use color to create a “visual anchor.” I love using a large, muted arch or a simple geometric block of color behind the bed to mimic the presence of a headboard. It’s a psychological trick that tells your brain exactly where the sleeping zone begins.
The Bottom Line
Don’t let “perfect” stop you from starting; a functional, DIY headboard is better than an empty wall and a drained bank account.
Prioritize durability and materials that fit your actual lifestyle, whether that’s easy-to-clean wood or low-maintenance fabric.
Use what you have or find it cheap—the best projects are the ones that use thrifted finds or scrap materials to save your budget for things that matter.
## The Reality of a Good Home
“A headboard shouldn’t be a status symbol you finance for three years; it should be something you build, something that fits your space, and something that actually feels like you when you lay your head down at night.”
Owen Silas Vance
The Bottom Line
At the end of the day, whether you’re going with a reclaimed wood slab, some clever upholstery, or a minimalist metal frame, the goal is the same: making your space feel like it actually belongs to you. You don’t need a massive budget or a degree in interior design to transform a bedroom from a place where you just crash into a sanctuary. We’ve looked at how everything from scrap materials to thrifted finds can become a centerpiece, and the common thread is that you don’t need perfection to get started. Just pick a method that fits your current skill level, grab your tools, and commit to the process.
I know that starting a project can feel a little intimidating, especially if you’ve never picked up a drill or a staple gun before. But honestly? The most important part isn’t the final result—it’s the fact that you actually did something with your own two hands. There is a specific kind of quiet confidence that comes from looking at a piece of furniture and knowing you built it, fixed it, or made it better. Stop waiting for the “perfect” time or the “perfect” apartment to start living well. Just grab your multi-tool, get to work, and build something that lasts.
Frequently Asked Questions
What kind of tools do I actually need to get started if I don't own a full workshop?
Look, you don’t need a garage full of heavy machinery to make this happen. I started with just a basic cordless drill, a tape measure, and a box of wood screws. If you’re working with fabric, grab a heavy-duty stapler. Honestly, if you can borrow a circular saw from a neighbor or a friend, you’re golden. Focus on the essentials first; don’t let a lack of gear stop you from starting.
How do I make sure a DIY headboard is sturdy enough that it won't wobble or damage my wall?
The last thing you want is a headboard that sounds like a drum set every time you lean back. If you’re mounting it directly to the wall, find your studs—don’t just trust drywall anchors. If you’re building a freestanding frame, use wood glue in every joint, not just screws. It’s the glue that actually prevents the wobble over time. Check your connections twice; a little extra bracing goes a long way.
Can I use these same methods to fix or upgrade a headboard I already have, or is this strictly for building from scratch?
Absolutely. In fact, I’d argue upgrading what you already own is even smarter than starting from scratch. Most “bad” headboards are just boring or slightly worn. You can use the same logic: sand down a beat-up wooden frame to refinish it, or wrap a plain metal one in heavy fabric to give it some texture. Don’t scrap a piece just because it looks dated. A little grit and some new materials can save it.