I remember the exact moment I realized I couldn’t just call a professional for every little thing. I was moving a heavy bookshelf in my first tiny rental, and—thwack—a chunk of drywall took a dive right next to the doorframe. I stared at that jagged, ugly crater for twenty minutes, convinced I’d have to lose my security deposit or live with a permanent scar on my living space. But here’s the thing: most people make learning how to patch a hole in the wall sound like a specialized trade that requires a degree and a massive toolkit. It’s not. It’s just a bit of patience and the right sequence of steps.
I’m not here to sell you on some expensive, high-tech renovation system or a complicated list of industrial tools. I want to show you how to fix that dent using the basic supplies you can actually find at a local hardware store without breaking your budget. We’re going to walk through the process of sanding, filling, and finishing so that the repair becomes completely invisible. By the time we’re done, you won’t just have a fixed wall; you’ll have the confidence to handle the next little mishap that comes your way.
Table of Contents
Guide Overview
Tools & Supplies
- Putty knife for applying compound
- Sandpaper (fine grit) for smoothing surfaces
- Utility knife for trimming edges
- Spackle or joint compound (1 small tub)
- Wall patch or mesh tape (1 piece)
- Sanding sponge (1 unit)
- Primer (1 small bottle)
Step-by-Step Instructions
- 1. First, you need to clean up the damage. If the edges of the hole are jagged or peeling, grab a utility knife and carefully trim away the loose bits of drywall. You want a clean, flat perimeter so the patch actually has something solid to grab onto. If you leave those loose flakes, your patch will eventually crack and look like a mess.
- 2. Next, grab some mesh adhesive patch tape. This is basically a little screen that sits over the hole to give the spackle some structure. Center it over the gap and press it down firmly. I usually use my thumb to make sure it’s really stuck to the wall, because if there’s an air pocket underneath, you’re just asking for trouble later.
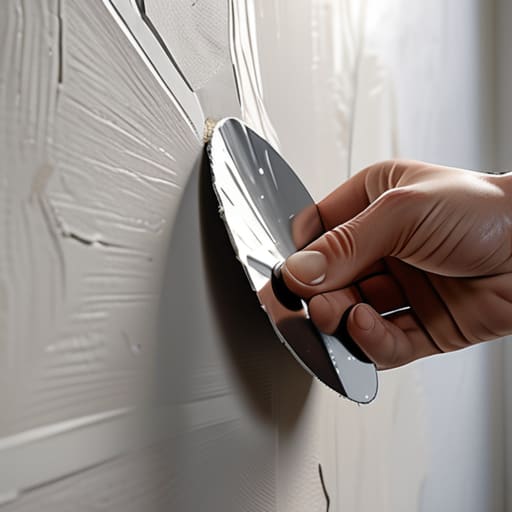
- 3. Now it’s time for the spackle. Take a putty knife—not a giant one, just a small, flexible one—and scoop up a decent amount of compound. Spread it over the mesh in thin, even layers. The biggest mistake I see people make is trying to fill the whole thing in one go; instead, aim for a thin, translucent layer that covers the mesh without becoming a mountain of goop.
- 4. Let that first layer dry completely. This is the hardest part because you’ll want to keep checking it, but patience is everything here. Once it’s dry, you’ll probably see some ridges or uneven spots. Take a fine-grit sanding sponge and lightly buff the area until it feels smooth to the touch. Don’t go overboard, or you’ll end up sanding down the actual wall around the hole.
- 5. If the hole was a bit deeper than usual, you might need a second coat. Repeat the spackling process, but this time, try to “feather” the edges. This means spreading the compound slightly wider than the patch itself so it tapers off into the wall. You want the transition to be so subtle that it’s practically invisible once you’re done.
- 6. Once your final layer is dry and sanded smooth, it’s time to prep for paint. Take a damp cloth and wipe away all the white dust from the sanding. If you skip this, your paint won’t stick right and you’ll end up with a textured patch that looks like a thumbprint. Clean surfaces make clean finishes.
- 7. Finally, grab your paint and a small roller or brush. Don’t just slap a square of color over the spot; instead, use a “feathering” motion with your brush to blend the new paint into the old color. This prevents that annoying “halo” effect around the patch. If you do it right, you’ll look at that spot in a week and completely forget it was ever there.
Mastering the Drywall Patch Kit for Small Holes
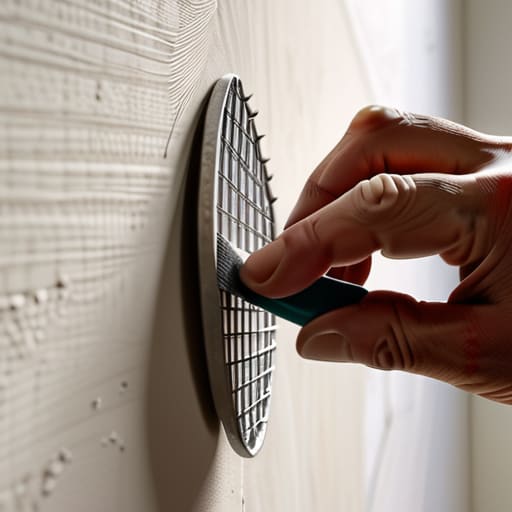
If you’re dealing with something more than a tiny nail prick—like a doorknob dent or a small gouge from moving furniture—skipping straight to the heavy stuff might feel overwhelming. This is where a drywall patch kit for small holes becomes your best friend. These kits usually come with a self-adhesive mesh patch that acts like a temporary skeleton for your repair. When you’re fixing dents in drywall, the mesh provides the structural integrity needed so your patch doesn’t just cave in the moment you apply pressure. It’s much easier than trying to bridge a gap with just compound alone.
The real secret to a professional finish, though, isn’t the patch itself; it’s your spackling compound application. I’ve made the mistake of glopping it on too thick, thinking it would save time, but that just leads to massive sanding sessions later. Instead, aim for thin, even layers. Think of it like frosting a cake—you want to feather the edges out so the transition between the patch and the original wall is almost invisible. If you take the time to layer it thin, you’ll spend way less time fighting with sandpaper later.
Pro Drywall Joint Compound Techniques Without the Stress
If you want to move past the “beginner” stage, you need to change how you think about your tools. Most people treat spackle like they’re frosting a cake, but it’s more like sculpting. When you’re working on spackling compound application, the biggest mistake I see is trying to do too much at once. Instead of one massive, thick glob, aim for several thin, translucent layers. It’s much easier to fix a tiny imperfection in a second pass than it is to try and sand down a mountain of dried mud that’s oozing out of the hole.
Another thing that separates a DIY fix from a professional-looking repair is how you handle the edges. If you’re using a wall repair mesh tape, make sure it’s seated firmly before you even touch the compound. Once you start applying the mud, use a wider putty knife than you think you need. By feathering the edges—basically spreading the compound thinner as you move away from the center—you blend the patch into the surrounding wall. This makes the transition almost invisible once you finally sand drywall smooth.
Pro Moves to Keep Your Patch from Looking Like a Disaster
- Don’t skip the sanding. I know, it’s messy and it’s a pain, but if you don’t sand those edges smooth before you paint, that patch is going to catch the light and scream “I tried to fix this.”
- Less is actually more when it comes to the compound. It’s tempting to glob it on to fill the hole faster, but you’ll just end up with a mountain of dried mud that’s twice as hard to sand down later. Thin, even layers are your best friend.
- Clean the dust before you paint. If you just slap paint over the sanding dust, it’s going to peel or look textured and weird. Take a damp microfiber cloth and wipe the area down completely so the paint actually sticks to the wall, not the debris.
- Match your texture, don’t just ignore it. If your walls have a slight orange peel or knockdown texture, don’t leave the patch perfectly flat and smooth. It’ll look like a literal thumbprint on your wall. Use a sponge or a textured roller to mimic the surrounding area.
- Check your lighting. I always grab my work light or use my phone flashlight to shine it across the wall at an angle. It reveals the tiny bumps and dips you can’t see with direct overhead lighting, letting you catch mistakes before they become permanent.
The Bottom Line
Don’t rush the drying process; applying multiple thin layers is always better than one thick, messy glob that’s going to crack later.
Invest in a decent sanding sponge rather than cheap sandpaper—it’ll save your wrists and give you a much smoother finish with less effort.
Keep your tools clean and your workspace contained; a little bit of prep work now prevents a massive headache when it’s time to paint.
## The Mindset Behind the Fix
“A hole in the wall isn’t a permanent flaw in your home; it’s just a small project waiting for a little bit of patience and the right amount of spackle.”
Owen Silas Vance
The Final Polish
At the end of the day, fixing a hole in your wall really comes down to three things: patience with the spackle, a light touch when you’re sanding, and not rushing the drying process. It’s easy to get frustrated when that first layer looks a little messy or uneven, but remember that multiple thin coats will always beat one thick, clumpy mess. Once you’ve mastered the art of the smooth finish and matched your paint, that dent or puncture will effectively disappear into the background. You’ve gone from staring at a glaring imperfection to having a seamless, professional-looking surface, all without having to call out an expensive contractor.
I know that looking at a damaged wall can feel like a tiny, nagging reminder of everything that needs “fixing” in your life, but don’t let it get to you. Most of the things we call “adulting” are just a series of small, manageable tasks that look intimidating until you actually pick up the putty knife. Every time you fix something yourself, you’re building a specific kind of quiet confidence that stays with you long after the paint has dried. You don’t need a massive toolkit or a degree in construction to take care of your space; you just need to show up, do the work, and realize that you are more than capable of handling it.
Frequently Asked Questions
How do I know if I need a full patch kit or if I can just use a little bit of spackle and a putty knife?
It really comes down to the scale of the damage. If you’re just looking at a tiny nail hole or a small scuff from moving a chair, don’t overthink it—a little spackle and a putty knife will do the trick perfectly. But if you’re staring at a hole from a doorknob or something where the drywall is actually crumbled away, grab the patch kit. You’ll need that structural support to keep the patch from sinking later.
Is it actually possible to sand this down so smooth that the patch becomes invisible once I paint it?
Honestly? Yes, but it’s all about the prep and the patience. You can’t just slap one thick layer of compound on and hope for the best; that’s how you end up with a visible hump. The secret is doing multiple thin, feathered layers and sanding them back progressively. If you use a fine-grit sanding sponge and take your time, the patch will disappear completely once the paint hits it. Just don’t rush the drying.
What’s the deal with drying times—do I really have to wait hours between coats, or can I speed this up?
Look, I get it. You want to finish this, hang a picture, and move on with your life. But here’s the truth: rushing the drying process is how you end up with cracks or a texture that looks like a topographical map. If the compound is still damp when you sand or coat it, you’re just moving mud around. Use a fan to help, but let the physics do the work. Patience pays off.