I was sitting on the floor of my first studio apartment, staring at a wobbly, particle-board desk from a big-box retailer that felt like it might collapse if I breathed on it too hard. I remember thinking that if I wanted something that actually lasted, I’d need a massive workshop and a degree in carpentry. But that’s the lie we’re sold: that learning how to build a desk is some elite, gatekept skill reserved for people with expensive garages. The truth is, you don’t need a masterclass or a thousand-dollar toolset to create a workspace that actually supports your life; you just need a solid plan and the willingness to get your hands a little dirty.
I’m not here to give you a complicated blueprint that requires a professional contractor to execute. Instead, I’m going to walk you through a stripped-back, practical approach to building a sturdy, functional desk that fits your space and your budget. We’re going to focus on the essential materials, the exact tools you actually need, and the small, non-negotiable steps that prevent a project from turning into a total headache. Let’s stop staring at the empty corner of your room and just start building.
Table of Contents
Guide Overview
Tools & Supplies
- Power Drill for driving screws
- Measuring Tape for accurate cuts
- Sandpaper for smoothing surfaces
- Level to ensure stability
- Wood Desktop (1 unit)
- Wooden Legs or Sawhorses (4 units)
- Wood Screws (1 box)
- Wood Glue (1 bottle)
Step-by-Step Instructions
- 1. First, you need to pick your surface. Don’t fall into the trap of thinking you need a custom-milled slab of walnut to be “legit.” For this build, I’m sticking to a solid butcher block from a big-box store or even a thick piece of plywood that you’ve sanded down. Just make sure you measure your workspace twice before you head to the hardware store; there is nothing more frustrating than getting home with a desktop that’s two inches too wide for your nook.
- 2. Next, grab your legs. You can go the DIY route with some 4×4 timber if you want that chunky, industrial look, but if you’re short on time or tools, honestly, just buy some metal hairpin legs or adjustable steel frames online. It’s a total cheat code for a professional look without the headache of heavy-duty joinery. Just ensure the weight rating of the legs matches the weight of the top you’ve chosen.
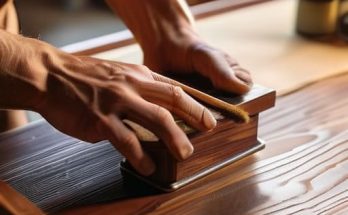
- 3. Now, let’s prep the wood. If you aren’t using a pre-finished top, you’re going to need to sand it. Start with a coarse grit to get rid of any factory imperfections, then move to a finer grit until the surface feels smooth under your hand. I always tell people: don’t rush the sanding. If you skip this, you’ll feel every single bump every time you rest your wrists on the desk while working.
- 4. Once the surface is smooth, it’s time to seal it. This is where most people get lazy, but it’s the most important part for longevity. Use a polyurethane or a hard-wax oil to protect the wood from coffee rings and scratches. I prefer a matte finish because it looks more natural and less like a shiny piece of plastic, but whatever you choose, apply at least two thin coats rather than one thick, messy one.
- 5. Flip your desktop upside down on a clean rug or some cardboard so you don’t scratch it. Line up your legs with the corners, making sure they are inset just enough to give you some legroom. I usually mark the holes with a pencil first. Use a drill to pre-drill small pilot holes; if you try to drive screws directly into the wood without doing this, you run a serious risk of splitting the grain, and that’s a mistake you can’t undo.
- 6. Drive your screws in, but keep it steady. Use a manual screwdriver for the final turns if you can, rather than a power drill, just to make sure you don’t over-tighten and strip the wood. Once the legs are secure, flip the desk upright—get a friend to help with this if it’s heavy—and give it a little shake to make sure nothing wobbles.
- 7. Finally, level it out. If your floor is uneven (and let’s be real, most apartment floors are), don’t fight it. Just grab some felt pads or adjustable furniture glides to put under the legs. It’s a small, five-minute fix that prevents your monitor from wobbling every time you type. Now, clear off the sawdust, set up your laptop, and actually get to work.
The Essential Desk Construction Materials List for Real Results
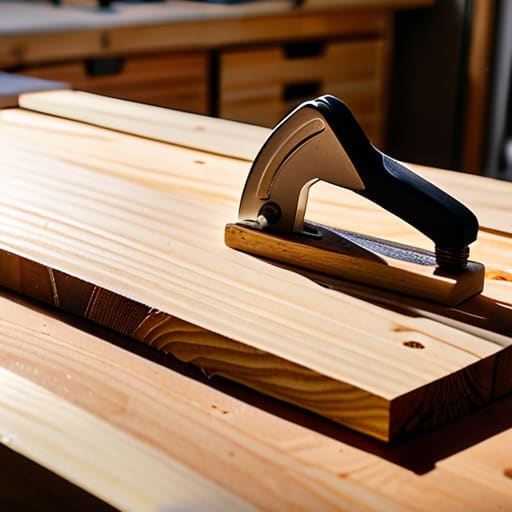
Before you head to the lumber yard, let’s get one thing straight: you don’t need a professional workshop to do this right. When I’m putting together my desk construction materials list, I prioritize durability over flashiness. If you’re looking for the best wood for office desks without breaking the bank, I highly recommend looking at birch plywood or pine. They’re forgiving, easy to sand, and won’t make your wallet cry like solid walnut would. Just make sure you grab some wood glue and a decent set of clamps; they’re the unsung heroes that keep everything from wobbling later.
Don’t get paralyzed by the sheer amount of gear at the hardware store, either. You don’t need a massive collection of specialized woodworking tools for beginners to get a solid result. A reliable drill, a level, and a simple measuring tape are your best friends here. I always tell myself to measure twice and cut once—it sounds like a cliché, but it’ll save you from a very expensive trip back to the store because you miscalculated your surface area. Keep it simple, keep it sturdy, and focus on the build.
Choosing the Best Wood for Office Desks and Minimalist Design Ideas
When you’re standing in the lumber aisle, it’s easy to feel overwhelmed by the sheer amount of grain and price tags. If you’re looking for the best wood for office desks without breaking your budget, I always suggest starting with pine or birch. They are forgiving, easy to sand, and won’t make your bank account weep. If you’re feeling a bit more ambitious and want something that will last a lifetime, you might look into oak or walnut, but keep in mind those require a bit more patience and better woodworking tools for beginners to handle the harder density.
As for the look, I’m a big believer in keeping things simple. For minimalist desk design ideas, I usually lean toward a clean, single-slab top with slim, industrial-style metal legs. You don’t need ornate carvings or complex joinery to make a statement; sometimes, the most effective setup is just a smooth surface and a clear workspace. Focus on the function first—make sure the height feels natural for your chair—and let the natural beauty of the wood do the heavy lifting for your aesthetic.
Five Things I Wish I Knew Before My First Build
- Don’t skip the sanding. You might think the wood looks smooth enough out of the box, but if you don’t hit it with a fine-grit sandpaper before you stain or seal it, your forearms are going to regret it every time you rest them on the surface.
- Measure twice, but check your level three times. I’ve seen too many people build a perfectly sturdy desk only to realize it wobbles because they didn’t account for a slightly uneven floor or a wonky leg. Use a level; it’s not a suggestion.
- Budget for the “hidden” costs. When I was starting out, I’d calculate the cost of the wood and think I was golden, then realize I was $40 short because I forgot about drill bits, wood glue, and sandpaper. Always keep a little extra in your pocket notebook for the small stuff.
- Stop aiming for perfection. If you end up with a tiny knot in the wood or a screw head that’s slightly recessed, don’t scrap the whole project. Real furniture has character. As long as it’s structurally sound and level, you did the job.
- Test your ergonomics before you commit. Before you screw everything down permanently, mock up the height. Sit in your office chair and make sure the desk isn’t going to leave you with a neck ache by Tuesday. It’s much easier to adjust a prototype than a finished piece.
The Bottom Line
Don’t get paralyzed by the perfect wood choice; pick something sturdy and available, then focus on the joinery and stability.
Your tools don’t need to be professional-grade, they just need to be functional enough to get the job done safely.
Build for your actual needs, not an Instagram aesthetic—a desk that fits your space and your budget is a win.
## The Reality of the Build
“A desk isn’t about having the most expensive slab of walnut or the fanciest hardware; it’s about building a reliable surface that actually works for your life. Don’t get paralyzed by the fear of making a mistake—just measure twice, cut once, and remember that a little bit of sawdust is just the price of entry for a space you actually own.”
Owen Silas Vance
Finishing the Job
At the end of the day, building this desk isn’t about achieving some flawless, showroom-ready masterpiece. It’s about the fact that you picked the right wood, gathered your materials without breaking the bank, and actually followed through on the assembly. You’ve moved past the stage of just staring at a Pinterest board and actually put your hands to work. Whether you went with a heavy oak or a budget-friendly pine, you now have a workspace that is specifically tailored to your needs rather than something mass-produced that doesn’t quite fit your room. You’ve done the heavy lifting, and the hardest part—the mental hurdle of starting—is officially behind you.
My best advice is to not let the fear of a tiny mistake stop you from finishing. There might be a slight gap in a joint or a spot where the stain went on a little heavy, but that’s just part of the process. Those little imperfections are actually what make it yours. I’ve learned through years of fixing up old furniture that competence is a muscle you build every time you pick up a screwdriver instead of calling a professional. So, clear off the sawdust, set up your laptop, and start using the space you built. You earned it.
Frequently Asked Questions
How do I make sure the desktop is actually level and won't wobble once I move it into my room?
There’s nothing worse than finishing a project only to have it shake every time you type. First, use a spirit level across the top before you even think about securing anything. If your floor is uneven—which, let’s be real, most rental floors are—don’t panic. I always keep some heavy-duty felt pads or adjustable leveling feet in my kit. Just slide them under the legs until that wobble disappears for good.
Do I really need power tools for this, or can I get away with just a basic hand drill and a screwdriver?
Look, I’ve been there—staring at a pile of wood with nothing but a manual screwdriver and a prayer. You can get away with a basic hand drill and a screwdriver, but I’ll be honest: it’s going to be a workout. If you’re building something structural, a drill saves your wrists and keeps your screws straight. If you’re on a strict budget, go for it, just pace yourself. Don’t let a lack of gear stop you from starting.
What’s the best way to finish the wood so it doesn't look cheap or get ruined by a coffee spill?
If you want to avoid that “cheaply painted” look, skip the heavy stains and go for a clear, hard-wearing finish. I usually recommend a water-based polyurethane. It dries fast, doesn’t smell like a chemical factory, and most importantly, it won’t yellow your wood over time. Apply three thin coats rather than one thick one—it’s more work, but it’s the only way to ensure that coffee spill won’t leave a permanent ring.