I still remember the exact moment I realized I’d been lied to about “adulting.” I was twenty, staring at a pair of thrifted trousers I’d bought for five bucks, watching a seam unravel like a cheap sweater. My first instinct wasn’t to call a tailor—I couldn’t afford one—it was to feel completely defeated by a piece of fabric. The internet told me I needed a $400 sewing machine and a studio full of specialized tools just to fix a hem, but that’s just gatekeeping. You don’t need a massive setup to master sewing basics for beginners; you just need to stop letting the intimidating jargon scare you off from actually picking up a needle.
I’m not here to sell you on a lifestyle aesthetic or a complicated curriculum that requires a degree to understand. My goal is to strip away the fluff and give you the practical, no-nonsense steps I used to learn how to mend my own clothes and upcycle furniture upholstery without breaking the bank. We’re going to focus on the skills that actually matter for your daily life, moving past the hype so you can start doing the work with confidence.
Table of Contents
The Essential Sewing Machine Tools You Actually Need
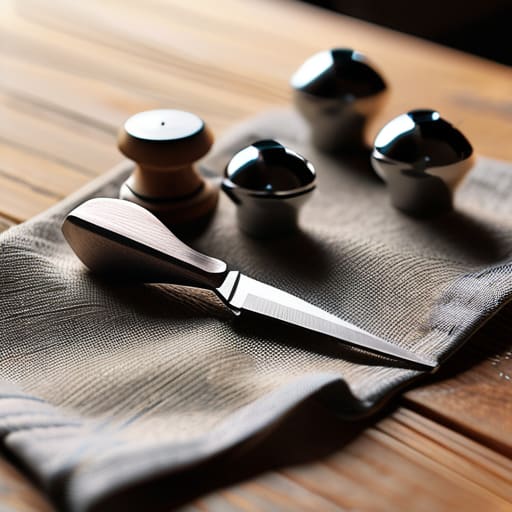
Look, you don’t need a studio full of expensive gadgets to get started. When I first started fixing my own clothes, I felt like I was failing because I didn’t have a professional setup, but that’s just gatekeeping. To build a solid sewing notions and supplies list, start with the basics: a decent pair of fabric shears (never use them on paper, seriously), a seam ripper—which you will use more than you think—and a handful of glass-head pins. These are the real essential sewing machine tools that actually make the job easier rather than just cluttering your desk.
Once you have your kit, your machine is the heart of the operation. You don’t need the most expensive computerized model on the market; you just need something reliable that can handle different fabric types for new sewists, from sturdy denim to lighter cottons. Before you even touch a piece of cloth, spend ten minutes practicing how to thread a sewing machine and running some test stitches on a scrap. It’s much better to mess up on a piece of trash than on your only good shirt.
How to Thread a Sewing Machine Without the Stress
Look, I get it. The first time you sit down at a machine, those little metal guides and tension discs look like a high-stakes puzzle designed to make you fail. I remember staring at my first thrifted machine, feeling like I needed a degree just to get the thread through the eye of the needle. But here is the truth: how to thread a sewing machine isn’t some mystical art; it’s just a sequence. Most of the time, when things go wrong, it’s because we skipped a step or tried to rush it.
The biggest pro-tip I can give you is to follow the literal path etched into the machine. Most modern models have numbered arrows printed right on the casing. Follow them religiously. Start with the spool, wind your bobbin, and then work your way through the tension discs. One of the most common sewing mistakes to avoid is forgetting to pull the thread through the take-up lever—that little metal hook that moves up and down. If you miss that, you’ll end up with a massive bird’s nest of tangled thread under your fabric, and trust me, you don’t want to spend twenty minutes picking that mess out.
5 Ways to Stop Fighting Your Fabric
- Don’t go overboard with the fancy stuff; start with a decent pair of fabric shears and keep them strictly for cloth. If you use them to cut paper, you’ll dull the blades instantly, and you’ll be left wondering why your cuts look jagged and frustrating.
- Ironing isn’t just for your work shirts. Seriously. If you want your seams to look professional instead of lumpy and amateur, you need to press every single seam flat as you go. It’s the difference between a project looking “homemade” and looking “handmade.”
- Embrace the seam ripper like it’s your best friend. I can’t tell you how many times I’ve messed up a stitch and felt like a failure. You didn’t fail; you just made a mistake that needs fixing. Rip it out, grab a breath, and try again. Even the pros do it.
- Stop trying to sew at light speed. I know it’s tempting to crank that pedal to get it over with, but slow, steady stitches are much easier to control. It’s better to take an extra five minutes doing it right than to spend twenty minutes unpicking a crooked line.
- Always test your tension on a scrap piece first. Before you commit to your actual project, take a leftover bit of the same fabric and run a few stitches. It’s the easiest way to catch a bird’s nest of thread or a loose stitch before it ruins your hard work.
The Bottom Line on Getting Started
Don’t get caught in the “gear trap”—you don’t need a professional studio to start; just get the basics right and you’re good to go.
Threading your machine is the biggest hurdle for most people, but once you master the sequence, the intimidation factor disappears.
Mistakes are just part of the process, so don’t sweat a messy seam; just unpick it and try again.
## The Real Secret to Starting
“Don’t wait until you have the perfect studio or a designer kit to start; just grab a needle, some thread, and a scrap of fabric. Competence isn’t about having the most expensive tools, it’s about having the guts to make your first few messy stitches.”
Owen Silas Vance
Just Start Stitching
Look, we’ve covered a lot of ground here, from gathering the actual tools you need to finally getting that thread through the needle without losing your mind. It’s easy to get paralyzed by the idea that you need a professional studio or a degree in textile design to make something useful. But really, it comes down to the basics: having the right shears, knowing your machine, and not being afraid to make a mess. Once you get the mechanics down, the intimidating part starts to fade away, and you’re left with nothing but a piece of fabric and a way to change it.
My biggest piece of advice? Embrace the mistakes. I’ve spent countless hours on my thrifted furniture projects realizing that the first attempt is rarely the masterpiece, and sewing is no different. You’re going to sew a seam crooked, and you’re probably going to have to rip it out and start over. That’s not failure; that’s just part of the process. Stop waiting for the perfect moment or the perfect setup to begin. Grab your kit, sit down, and just start doing it. You’ll be surprised how quickly you go from struggling with a bobbin to actually creating things you’re proud to own.
Frequently Asked Questions
I keep getting tangled threads—am I doing something wrong or is my machine just acting up?
Honestly, it’s usually not your machine acting up—it’s almost always a small setup error. Most “tangles” (we call them bird nests) happen because the top thread isn’t seated properly in the tension discs or the presser foot was down while you were threading. Before you panic and call a repair shop, stop, unthread everything, and re-thread with the presser foot up. Usually, that tiny adjustment is all it takes to get back on track.
Do I really need to spend a fortune on high-end fabric, or can I start with cheap scraps?
Look, please don’t drop a paycheck on luxury silk right now. I learned the hard way that expensive fabric is a recipe for heartbreak when you’re still mastering your tension settings. Start with cheap cotton scraps or old bedsheets. They’re forgiving, easy to pin, and—most importantly—they don’t matter if you accidentally sew a seam crooked. Use the “expensive stuff” for your wins; use the scraps to learn the ropes.
What's the best way to fix a mistake without having to rip everything apart and start over?
Look, I’ve definitely been there—staring at a crooked seam and feeling like the whole project is trashed. Before you go ham with the seam ripper, try “fudging” it. If the mistake is tiny, sometimes a strategic stitch or a well-placed patch can mask it. If you’re working with fabric, try pressing the seam in a different direction to flatten the error. Most of the time, a little creative redirection beats a total meltdown.