I was standing in my tiny backyard last summer, staring at a pile of expensive, pre-fabricated metal supports I’d bought online, feeling like a complete idiot. They looked great in the catalog, but the moment I tried to secure them into my uneven soil, they wobbled like they were made of toothpicks. That’s the thing about garden decor: you don’t need to spend a fortune on “aesthetic” solutions that fall apart at the first sign of a heavy vine. Learning how to build a garden trellis doesn’t require a degree in landscaping or a massive budget; it just requires a bit of sturdy wood and the willingness to get your hands dirty.
I’m not here to sell you on some complicated, high-end architectural project that takes all weekend to finish. Instead, I’m going to show you how to construct a functional, reliable structure using basic materials you can find at any local hardware store. We’re going to skip the fluff and focus on the actual mechanics—the kind of solid construction that actually holds up when your climbing plants start getting heavy. By the end of this, you’ll have a custom trellis that looks intentional, stays upright, and fits your space perfectly.
Table of Contents
Guide Overview
Tools & Supplies
- Measuring tape for accurate cuts
- Handsaw or miter saw for timber
- Drill with bits for pilot holes
- Screwdriver or drill driver for assembly
- Cedar or pressure-treated wood stakes (4-5 pieces)
- Garden twine or wire (1 roll)
- Wood screws (1 small box)
- Hammer and nails (optional)
Step-by-Step Instructions
- 1. First, you need to gather your supplies. Don’t go overboard with expensive, designer garden gear; you just need some sturdy cedar or pressure-treated wood (cedar lasts longer against rot), a box of exterior-grade screws, a drill, a saw, and some heavy-duty twine or zip ties. I always keep a spare roll of twine in my kit because you’ll inevitably realize you’re short halfway through.
- 2. Measure out your space and cut your wood. You’ll want two long vertical posts to act as the “legs” and several shorter horizontal pieces for the rungs. If you’re working with a small balcony or a raised bed, keep your measurements precise so you aren’t fighting with a bulky structure that takes up too much walking room.
- 3. Prep your posts for installation. If you’re planting directly into the ground, you’ll want to drive the vertical posts deep into the soil to ensure the whole thing doesn’t topple over during a summer storm. If you’re using a raised bed, you can simply screw the posts into the inner frame of the planter to keep things stable and tidy.
- 4. Assemble the frame. Lay your vertical posts on the ground and start attaching the horizontal rungs across them. I prefer using a drill to pre-drill small holes before driving the screws in; it prevents the wood from splitting, which is a total rookie mistake I learned the hard way while fixing up old furniture.
- 5. Create the climbing grid. A solid wooden frame is great, but most climbing plants (like jasmine or peas) need something to actually grab onto. Take your twine or thin wire and weave it in a diamond or grid pattern across the wooden frame. This gives your plants a reliable roadmap to follow as they grow upward.
- 6. Secure the structure and plant. Once the trellis is upright and steady, go ahead and plant your climbers at the base of the posts. As they start to sprout, gently guide the first few tendrils toward your twine. It might feel a bit tedious at first, but consistency is key to making sure the plant doesn’t just grow sideways along the ground.
Choosing Your Garden Trellis Materials List Without the Stress
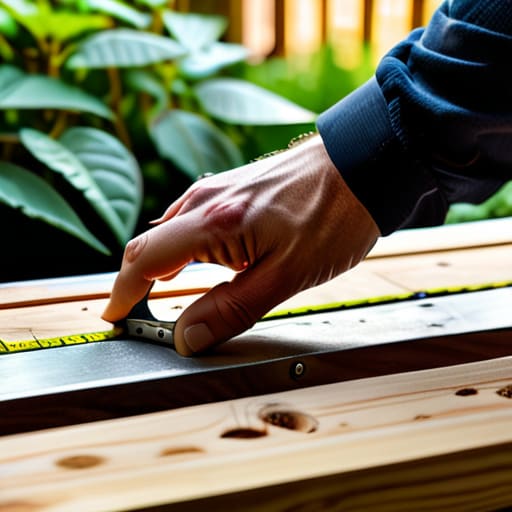
Look, I’ve spent enough weekends at thrift stores and hardware aisles to know that “material lists” can feel like a trap designed to make you spend more than you planned. When you’re looking at different garden trellis materials list options, don’t fall for the trap of buying everything on the shelf just because it looks pretty. If you’re working with a tight budget—which, let’s be honest, most of us are—you don’t need premium cedar for every single project. A bit of pressure-treated lumber or even some repurposed scrap wood can work wonders if you treat it right.
The real trick is matching your materials to what you’re actually growing. If you’re setting up vertical gardening solutions for something heavy like climbing beans or even a small squash, you need something beefy. Don’t try to support a heavy vine with thin bamboo stakes; they’ll snap the second the wind picks up. Prioritize structural integrity over aesthetics in the beginning. You can always paint or stain the wood later to match your vibe, but you can’t easily fix a collapsed structure once the plants have already taken root.
Simple Wooden Trellis Design Ideas for Real Results
When you’re looking at different wooden trellis design ideas, don’t feel like you need to build something that looks like it belongs in a high-end landscape magazine. I’ve learned through my own DIY projects that the best structures are the ones that actually serve the plant. If you’re working with a small patio or a cramped balcony, lean into vertical gardening solutions like a simple A-frame. It’s sturdy, uses minimal ground space, and provides a massive surface area for vines to grab onto.
If you have more horizontal room, a classic rectangular grid is your best bet. You can keep it dead simple by using scrap cedar or pressure-treated lumber to create a frame and then weaving thin bamboo stakes or even heavy-duty twine through it. This creates lightweight but effective climbing plant support structures that won’t break the bank. The goal isn’t perfection; it’s creating a reliable skeleton for your plants to climb. Just make sure whatever design you pick is anchored well—nothing kills the vibe faster than a trellis tipping over during a summer storm.
5 Pro-Tips to Keep Your Trellis from Failing
- Don’t skimp on the fasteners. I’ve seen too many flimsy DIY projects fall apart after one heavy rain because someone used cheap, thin nails instead of galvanized screws. Use screws that won’t rust, or you’ll be replacing the whole thing by next season.
- Test your soil before you plant. It doesn’t matter how perfect your trellis is if the climbing plants don’t have the nutrients to actually grow up it. Check your pH and throw in some compost first so you aren’t fighting an uphill battle later.
- Mind the weight. If you’re planning on growing something heavy like squash or heavy-duty ivy, you can’t just use thin bamboo stakes. You need a structural foundation—think thicker timber or reinforced posts—that can handle the literal weight of the harvest.
- Leave some breathing room. It’s tempting to cram your trellis right up against a fence or a wall, but plants need airflow to prevent mold and mildew. Give your greenery a little space to breathe, and your trellis (and your plants) will thank you.
- Plan for the “reach.” When you’re deciding how high to build it, think about your own height and your tools. You don’t want to realize halfway through the season that you can’t reach the top to prune or harvest without a ladder. Build it for the life you actually live.
The Bottom Line
Don’t get paralyzed by perfection; a simple, sturdy structure made of basic wood is better than a complex design that collapses under the weight of your plants.
Invest in quality fasteners and weather-resistant wood from the start so you aren’t out there replacing rotten stakes three months into the growing season.
Always build for the plant you actually have, not the one you saw on a Pinterest board, to ensure your trellis provides real, functional support.
The Reality of DIY
“You don’t need a master carpenter’s degree or a garage full of expensive power tools to give your plants some support; you just need a bit of steady planning and the willingness to get your hands a little dirty to make something that actually lasts.”
Owen Silas Vance
Getting It Done and Moving On
At the end of the day, building a trellis doesn’t require a degree in landscape architecture or a massive budget. We’ve covered the essentials: picking the right materials that won’t rot in a month, selecting a design that actually fits your space, and following a straightforward assembly process. Whether you went with a simple wooden frame or something a bit more custom, the goal was to create a functional structure that supports your plants without turning your weekend into a total disaster. Just remember to double-check your stability before you let those heavy vines take over. If it’s sturdy and it’s upright, you’ve done the job right.
I know that starting a DIY project can feel a bit daunting when you’re staring at a pile of lumber and a hardware store receipt, but that’s where the growth happens. There is a specific kind of quiet satisfaction that comes from looking at a corner of your garden and knowing you built that support with your own two hands. Don’t worry about making it look like a Pinterest masterpiece on your first try; just focus on building competence one project at a time. Once those first green shoots start climbing your new trellis, you’ll realize that “adulting” is really just a series of small, manageable wins. Now, go get some dirt under your fingernails.
Frequently Asked Questions
How do I keep the wooden posts from rotting in the ground after a few months?
Look, I’ve seen too many DIY projects end up as mushy, rotting wood because people skip this part. If you want those posts to actually last, don’t just shove raw lumber into the dirt. First, use pressure-treated wood—it’s worth the extra few bucks. Second, coat the bottom ends in a wood preservative or even a bit of heavy-duty sealant before burying them. Finally, add a layer of gravel at the bottom of the hole to help with drainage.
What’s the best way to attach the trellis to my house or a fence without causing damage?
Look, I get it—nobody wants to drill a bunch of holes into a fence or siding only to regret it later. If you’re attaching to a fence, use heavy-duty zip ties or galvanized wire; they’re easy to swap out and won’t rot the wood. For a house, I’d suggest mounting a simple wooden frame to the studs first, or using masonry anchors if you’re on brick. Avoid direct contact with siding to prevent moisture traps.
Can I use this for heavy climbers like wisteria, or will it collapse under the weight?
Honestly? Don’t do it. Wisteria is a beast—it’s heavy, woody, and basically wants to take your whole garden down with it. The simple designs I mentioned are perfect for sweet peas or clematis, but for something that massive, you’ll need heavy-duty pressure-treated 4×4 posts and serious hardware. If you try to use a light DIY frame for wisteria, it will buckle. Plan for a permanent structure if you want to go big.