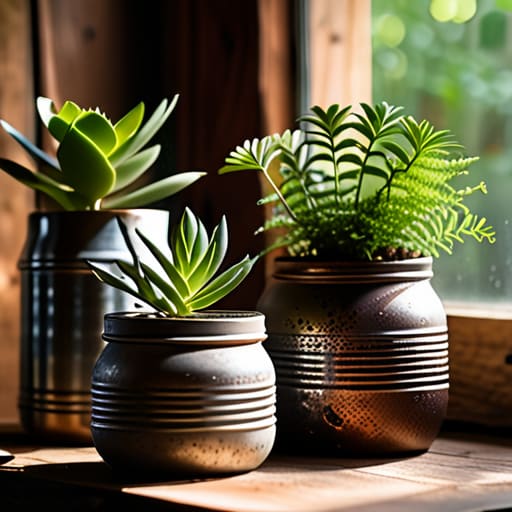
I was standing in the middle of a high-end home goods store last week, staring at a ceramic pot that cost more than my weekly grocery budget, and I just had to laugh. We’ve been sold this idea that if you want a “curated” indoor jungle, you need to drop a paycheck on designer stoneware. That is a total lie. Most of the time, you don’t need a massive budget or a degree in interior design to make your space feel alive; you just need to realize that diy planters are often better, tougher, and way more personal than anything you’ll find on a showroom shelf.
I’m not here to show you some over-the-top, Pinterest-perfect project that requires a workshop full of power tools you don’t own. Instead, I’m going to show you how to repurpose what you already have—from old tins to thrifted finds—to create functional, stylish homes for your greenery. We’re going to focus on the practical mechanics, like ensuring proper drainage so you don’t accidentally drown your plants, and how to finish your projects so they actually last. Let’s stop overcomplicating your decor and just get growing.
Table of Contents
Guide Overview
Tools & Supplies
- Drill and drill bits for creating drainage holes
- Measuring tape for accurate sizing
- Sandpaper to smooth rough edges
- Upcycled containers (tin cans, plastic bottles, or wooden crates)
- Potting soil (1 bag)
- Small pebbles (1 bag for drainage)
- Plants or seeds (as desired)
Step-by-Step Instructions
- 1. First, you need to scout for your base material. I usually hit up thrift stores or even check the recycling bin behind my apartment. Old tin cans, wooden crates, or even those heavy ceramic bowls that have a chip in them work perfectly. The only real rule is that the material needs to be durable enough to hold soil without cracking or rusting through immediately.
- 2. Once you’ve got your container, you have to deal with drainage. This is where most people mess up and accidentally kill their plants by drowning them. If you’re using a plastic or metal container, grab a drill or a hammer and a large nail to punch a few holes in the bottom. If you’re using something like a wooden crate, you might want to line the bottom with a bit of landscape fabric first to keep the dirt from leaking out of the cracks.
- 3. Next, let’s talk about the “aesthetic” part—but we’re doing it on a budget. If your container looks a little rough around the edges, don’t sweat it. You can sand down old wood to give it a clean look, or use a bit of leftover spray paint to give a tin can a matte finish. I personally love using leftover wood stain from my furniture projects to give thrifted finds a high-end, mid-century vibe without spending a dime.
- 4. Now, prepare your soil. Do not just grab a handful of dirt from outside; it’s usually too dense and might carry pests into your living space. Pick up a decent bag of potting mix from a local hardware store. I like to mix in a little bit of perlite or coco coir if I can find it, as it helps keep the soil airy so the roots can actually breathe.
- 5. It’s time to layer. Start by putting a thin layer of small pebbles or broken-up terracotta pieces at the very bottom of your planter. This creates a “reservoir” area that helps prevent waterlogging if you accidentally overwater. Once that layer is set, scoop in your potting mix until you’re about an inch away from the rim.
- 6. Carefully transplant your plant into its new home. If you’re starting from a nursery pot, gently squeeze the sides of the plastic to loosen the root ball before flipping it into your DIY planter. Press the soil down firmly but gently around the base to get rid of any large air pockets, which can dry out the roots too quickly.
- 7. Finally, give it a good soak. Take your new planter to the sink or outside and water it until you see the first signs of moisture trickling out of the drainage holes you made earlier. This ensures the soil is fully hydrated and helps the plant settle into its new environment. Now, just find a spot with the right amount of light and let it do its thing.
Smart Upcycled Container Gardening for Real Results
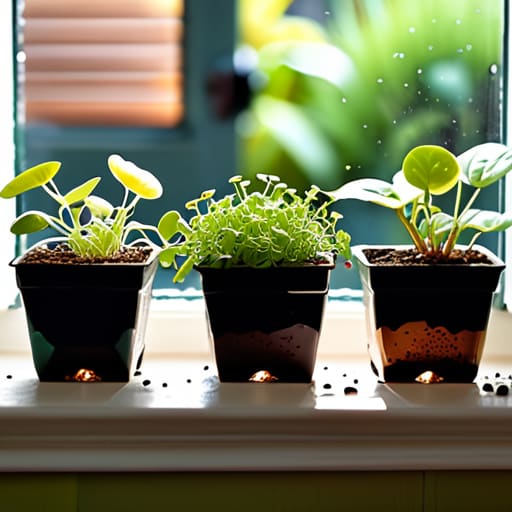
If you’re looking to scale this up without draining your bank account, the real secret is leaning into upcycled container gardening. I’ve spent a lot of time scavenging near thrift stores and even my own recycling bin to find vessels that actually have character. For example, if you have a collection of soda or water bottles, you can easily turn them into recycled plastic bottle planters for a windowsill setup. They aren’t the prettiest things in the world, but they are incredibly functional for starting seeds or growing small greens when you’re tight on space.
The biggest mistake I see people make—and I definitely made this when I first started—is forgetting about the plumbing. No matter what you’re using, whether it’s an old tin can or a cracked ceramic bowl, you absolutely have to ensure there are proper drainage holes for homemade pots. Without them, you’re basically just building a tiny, stagnant swamp that will kill your plants in a week. If you’re feeling a bit more ambitious, try hunting for old crates to attempt a rustic wooden planter box diy. It adds a bit of soul to a room without the “big box store” price tag.
Budget Friendly Garden Decor Built to Last
Once you’ve got your containers sorted, the next hurdle is making them look like they actually belong in your space rather than looking like a collection of random trash. If you’re going for a more polished look, I’m a huge fan of a rustic wooden planter box diy using scrap cedar or even old shipping pallets I’ve found behind local shops. A quick sanding and a coat of matte sealant can take something that looks like junk and turn it into a centerpiece that feels intentional. Just remember: if you’re using wood, don’t skip the weatherproofing unless you want your hard work rotting by next season.
For those of us living in smaller apartments, I usually lean toward indoor herb garden containers that utilize vertical space. You can hang small terracotta pots or even cleaned-out tin cans from a simple wooden trellis or a tension rod. The trick to keeping these looking high-end is consistency in your color palette. If all your vessels are a similar shade of charcoal or terracotta, the whole setup looks curated rather than cluttered. It’s about making small, smart choices that add character without draining your bank account.
5 Things I Wish I Knew Before My First DIY Pot
- Drainage isn’t optional. If you’re repurposing a container like a tin can or a plastic bucket, grab your multi-tool or a drill and make sure there are holes in the bottom. Without them, you’re just making a swamp, and your plants will rot before the month is out.
- Don’t skimp on the soil. It’s tempting to just grab the cheapest bag at the grocery store, but good potting mix is the foundation. If the soil is junk, it doesn’t matter how cool your upcycled planter looks; nothing is going to thrive in it.
- Think about weight before you hang anything. If you’re DIYing hanging planters from old crates or heavy ceramic pieces, make sure your mounting hardware can actually handle the load once you add wet soil and a growing plant. I’ve learned that the hard way.
- Scale your container to the plant, not the other way around. A common mistake is putting a tiny seedling in a massive pot. Too much extra soil holds too much moisture, which leads to root rot. Start small and move up as they grow.
- Protect your surfaces. If you’re putting your new DIY planters on a wooden desk or a thrifted mid-century side table, use a saucer or a coaster. I spent way too much time trying to fix water rings on furniture I actually liked; just build a little tray to catch the runoff.
The Bottom Line
Stop looking at “trash” as waste; an old tin can or a cracked ceramic pot is just a planter that hasn’t been repurposed yet.
Focus on function over aesthetics—as long as it has drainage and holds soil, it’s a viable home for your plants.
You don’t need a massive garden budget to create a green space, just a bit of patience and the willingness to get your hands dirty.
The Real Value of a DIY Planter
“A planter doesn’t need to be a designer piece from a boutique to look good; it just needs to be something you built, something that works, and something that didn’t cost you a week’s worth of groceries.”
Owen Silas Vance
The Bottom Line
At the end of the day, making your own planters isn’t about achieving some Pinterest-perfect, curated lifestyle. It’s about realizing that you don’t need to drop eighty bucks at a big-box garden center just to add a little life to your windowsill. We’ve covered how to scout for the right upcycled containers, how to prep them so they actually last, and how to keep your decor looking intentional rather than cluttered. Whether you’re using a vintage tin or a repurposed wooden crate, the goal is the same: functional greenery that fits your budget and your specific space. Remember, the most important part of any DIY project is ensuring your containers have proper drainage so your plants actually survive the month.
I know that starting something new can feel a bit daunting, especially when you’re worried about wasting money or making a mess. But honestly? Most of us are just figuring it out as we go. Don’t let the fear of a little dirt or a minor mistake stop you from building your own environment. You don’t need a massive backyard or a huge inheritance to create a space that feels like home; you just need a little bit of patience and the willingness to try. Grab that multi-tool, find a container, and just get started. You’ve got this.
Frequently Asked Questions
How do I make sure my upcycled containers actually drain well so I don't accidentally drown my plants?
Look, I’ve definitely killed a few succulents by overwatering them in containers without drainage, so I get the anxiety. If you’re using something like a tin can or a plastic bucket, you have to drill holes in the bottom. Grab a power drill or even a heated metal skewer if you’re working with smaller stuff. If you can’t drill, add a thick layer of gravel or coarse sand at the bottom to help water escape.
What kind of sealant or paint should I use so my DIY planters don't start rotting or peeling after a few weeks outside?
Look, nothing kills the vibe faster than a DIY project turning into a soggy, peeling mess after one rainstorm. If you’re using wood, grab a high-quality exterior-grade sealant or a Spar Urethane—it handles moisture and UV much better than the cheap stuff. For containers like metal or plastic, a spray primer followed by an outdoor acrylic enamel works wonders. Just make sure everything is bone-dry before you start; otherwise, you’re just sealing the rot inside.
Can I use these same containers for vegetables, or should I stick to just decorative plants to keep things simple?
You can absolutely grow food in these, but let’s be realistic: vegetables are a bit more demanding than a pothos. If you want to go the veggie route, just make sure your containers are deep enough for roots and have decent drainage so they don’t drown. I usually start with herbs or leafy greens—they’re hard to kill and much more forgiving. Don’t overthink it; just start small and see what sticks.